
Webhooks
Accessing Webhooks
Users can access the webhook settings by navigating to the sidebar within the software’s interface. Look for and click on the “Webhooks” option, which will direct users to the webhook management page.
Adding Webhooks
Upon entering the webhook management page, users will find options to add new webhooks. This initiates the process of configuring a new webhook within the software. For this some information required:
- Webhook Action Name: Provide a descriptive name for the webhook action.
- Webhook For: Specify the particular person or action that will trigger the webhook. For example, this could be client,employee,invoice,lead,project,proposal,task or any other relevant event.
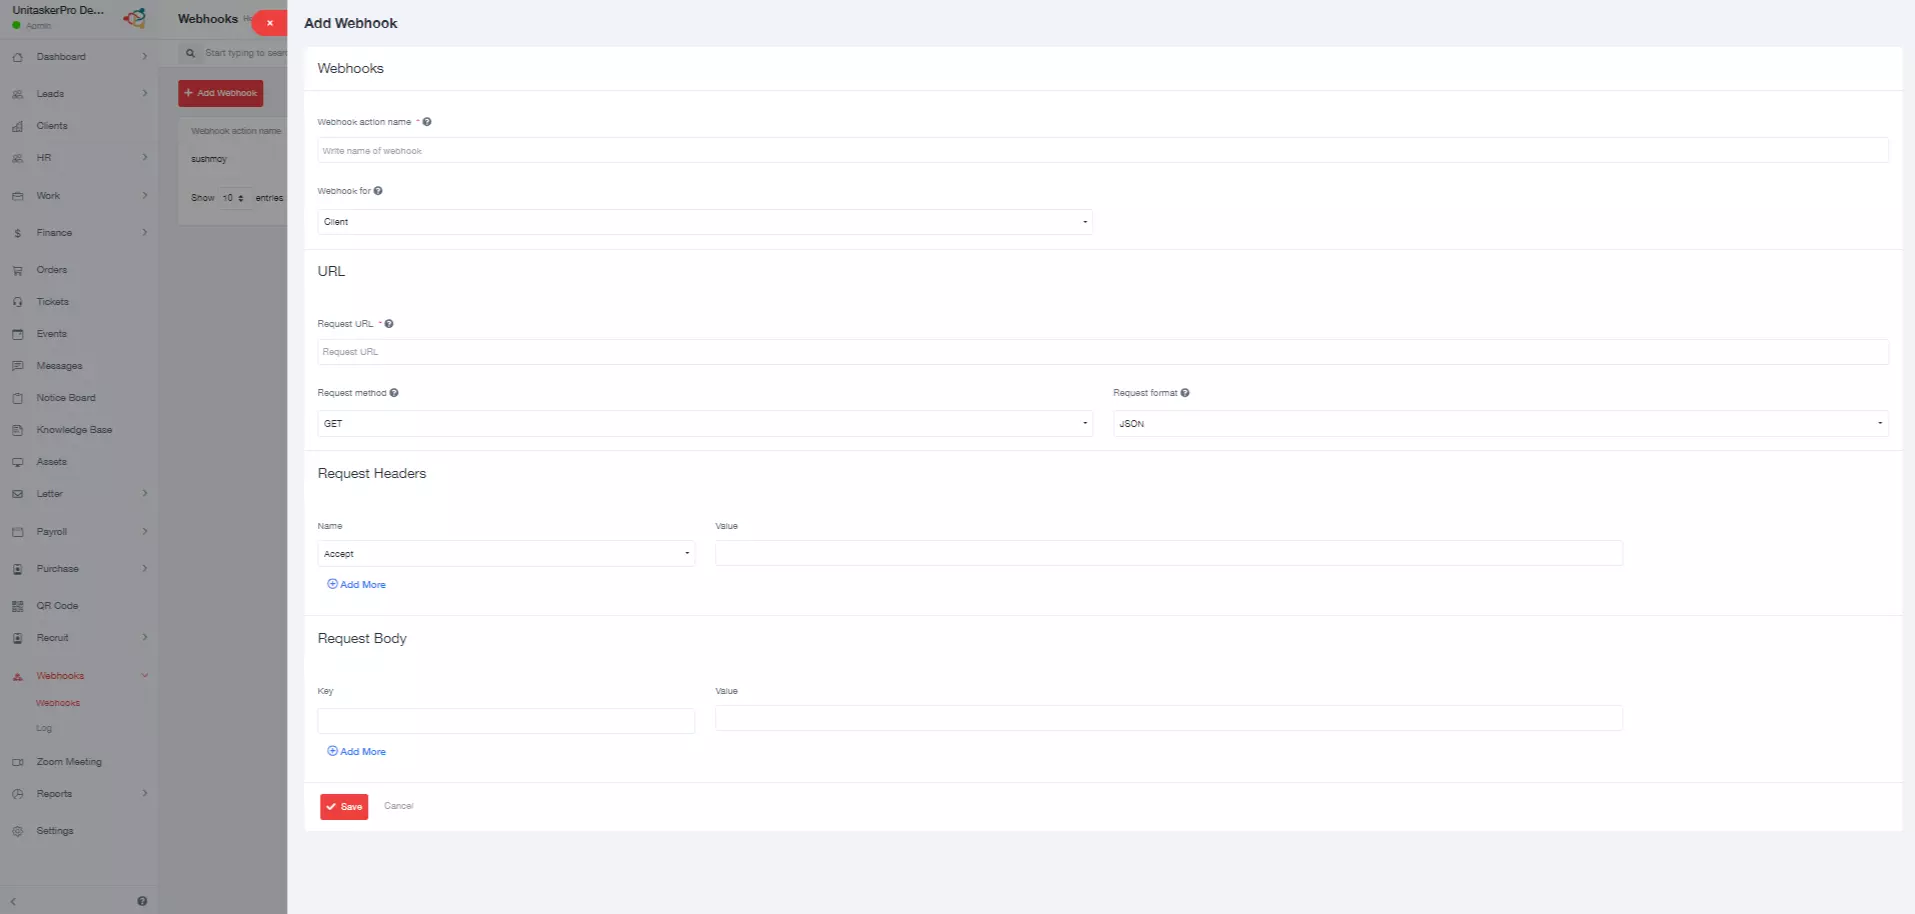
URL Configuration:
- Request URL: Input the URL where the webhook payload will be sent. This URL should be capable of receiving HTTP requests.
- Request Method: Choose the appropriate HTTP method to be used for sending the webhook payload. Common methods include POST, GET, PUT, and DELETE.
- Request Format: Specify the format for the data to be transmitted in the request, such as JSON.
- Request Headers:Users may need to include additional headers in the webhook request, depending on the requirements of the receiving endpoint.
- Name: Define the header name, such as Accept, accept-encoding, cookie, connection etc.
- Value: Provide the corresponding value for the specified header, ensuring compliance with the receiving system’s requirements.
- Request Body:If the webhook requires additional data to be sent along with the request, users can define the request body parameters.
- Key: Define the parameter key, representing the data field to be included in the request.
- Value: Input the corresponding value for the parameter key, providing the necessary information to fulfill the webhook’s purpose.
- Saving: Once all the required information has been provided, users can save the webhook configuration to activate it within the software just by clicking on the “Save” button.