
Tickets
Ticket Management
The ticket feature of UniTaskerPro serves as the backbone of employee and customer support systems, enabling organizations to efficiently address, track, and resolve employee and customer inquiries and issues. This comprehensive guide provides detailed instructions on navigating and utilizing the ticket feature, ensuring support teams can manage their workflows effectively.
Accessing Tickets
Navigate to the Ticket Feature
Find the ticket feature located on the sidebar of the platform’s interface. Click on the “Ticket” option to access the ticket management area. This is your gateway to viewing and handling all customer-related tickets.
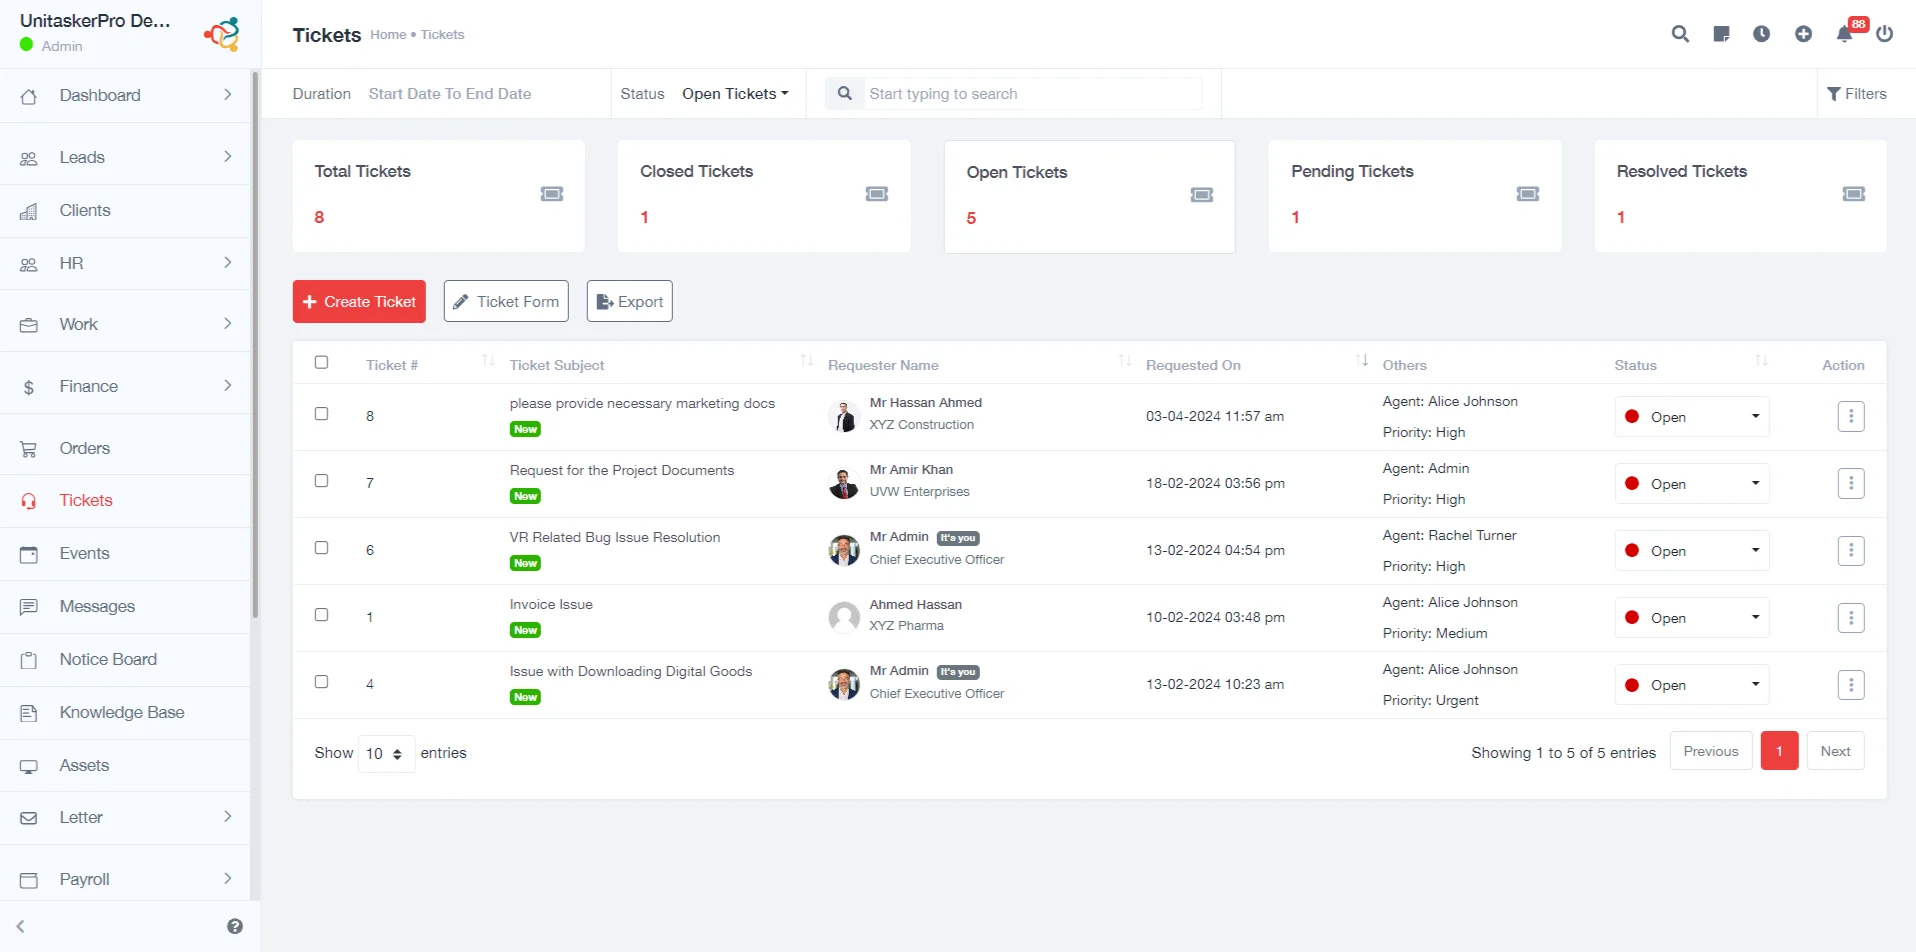
Ticket Overview Page
Upon entering the ticket section, you’re presented with a dashboard that lists all previously saved tickets. This dashboard is designed for quick access and management of tickets, featuring:
Basic Ticket Information: Each ticket is displayed with essential details to provide a clear overview at a glance. These details include:
- Ticket Number: A unique identifier for each ticket.
- Ticket Subject: A brief description or title of the issue.
- Requester Name: The name of the individual or entity that submitted the ticket.
- Requested On: The date and time when the ticket was created.
- Agents: The support agents assigned to or involved with the ticket.
- Priority: The level of urgency assigned to the ticket, which helps in prioritizing tasks.
- Status: The current stage of the ticket within the resolution process, such as Open, Pending, Resolved, or Closed.
- Action Buttons: These are interactive tools that allow users to perform specific actions, such as viewing detailed information about a ticket or deleting tickets that are no longer relevant.
Ticket Categories
For better organization and efficiency, tickets are sorted into categories based on their status:
- Total Tickets: The aggregate count of all tickets within the system, providing a snapshot of workload and activity.
- Open Tickets: Tickets are currently active and awaiting resolution.
- Pending Tickets: Tickets on hold, possibly awaiting further information or action from another party.
- Resolved Tickets: Tickets where the issue has been addressed but might need final confirmation from the requester before closing.
- Closed Tickets: Tickets that have been fully resolved and closed, indicating a complete cycle of the support process.

Managing Tickets
Creating a New Ticket
- Initiate Ticket Creation
By clicking the “Create Ticket” button, users can initiate the process of logging a new customer issue or inquiry into the system. This is the first step in bringing a customer’s concern to the attention of the support team.
- Ticket Information
A form appears, requiring input of various details to ensure a comprehensive understanding of the issue:
- Requester: Identification of the person or entity reporting the issue, essential for follow-up and personalized support.
- Requester Name: The specific name of the individual making the request, allowing for direct communication.
- Assign Group: Designation of the ticket to a specific team or department, ensuring it reaches the right expertise.
- Agent: Selection of an individual support agent responsible for the ticket, fostering accountability.
- Add Project: Linking the ticket to a project for context and better resource allocation.
- Ticket Subject and Description: A clear, concise subject and a detailed description provide a thorough understanding of the issue or request, enabling effective resolution strategies.
- Priority: Setting the urgency level helps in prioritizing tasks and managing resources effectively.
- Type: Categorizing the ticket according to its nature, such as a question, problem, or request, helps in directing it to the appropriate resolution path.
- Channel Name: Indicating the origin of the ticket (email, phone, web, etc.) offers insights into preferences and potential channel-specific issues.
- Tags: Adding keywords or tags aids in categorizing and searching for tickets, improving organization and tracking.
- Save
After filling in all necessary details, clicking “Save” finalizes the creation of the ticket.

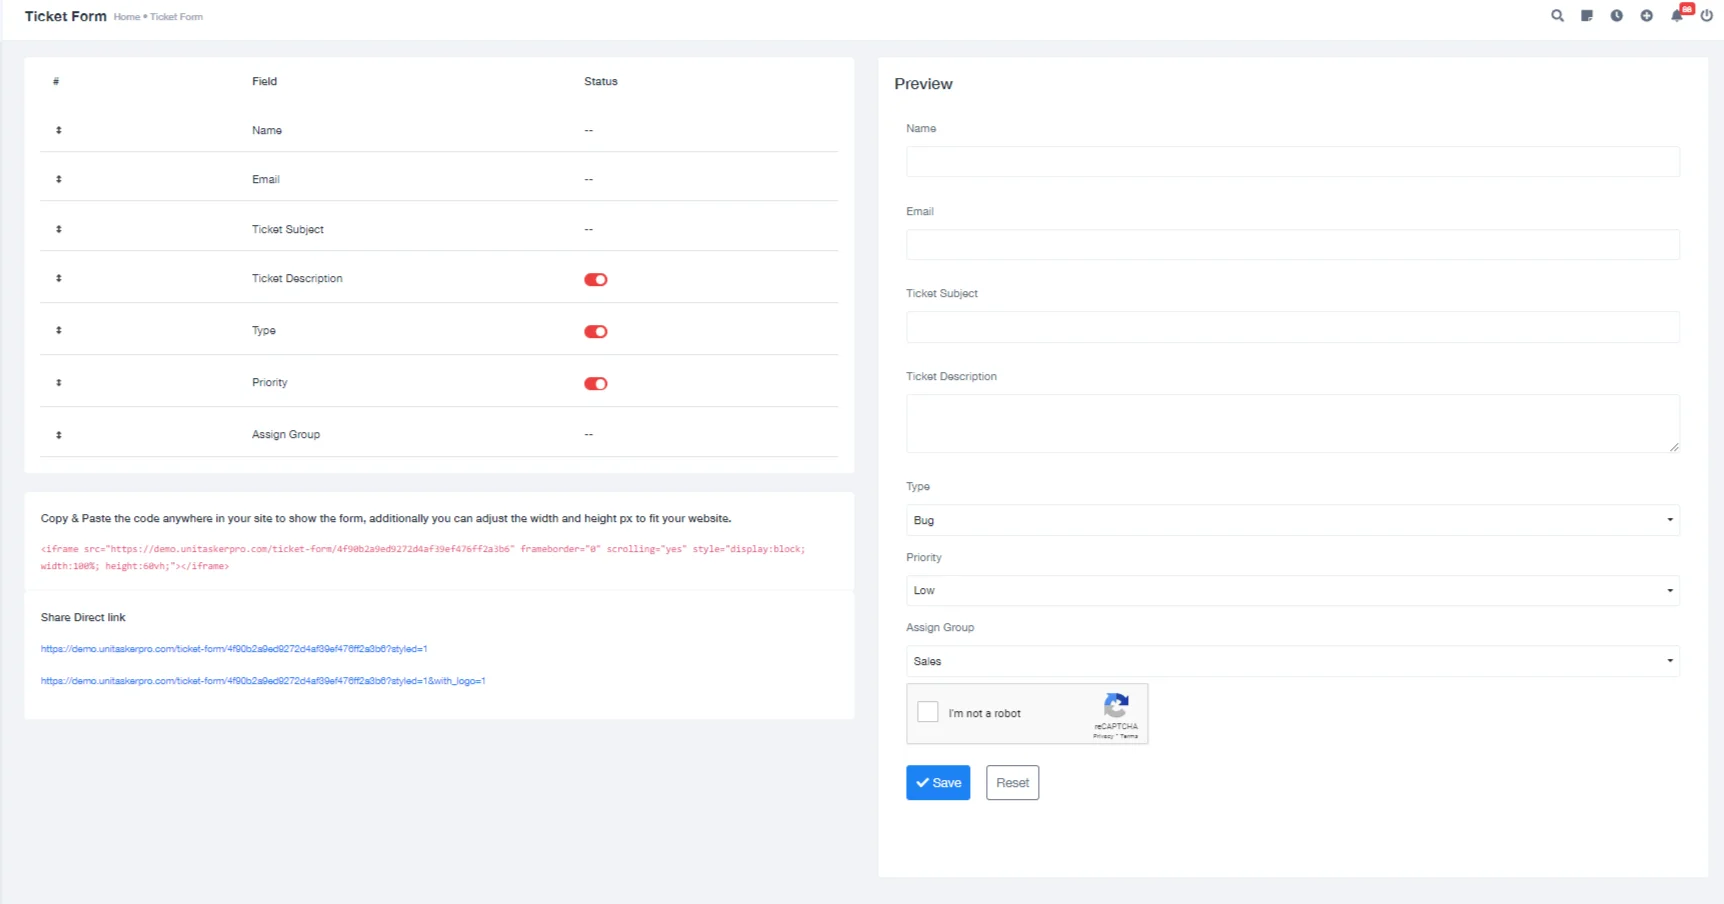
Customizing Ticket Forms
- Accessing Ticket Forms: Select “Ticket Form” to modify the default ticket submission form.
- Form Customization: Users can add or remove fields from the ticket form to tailor it to their specific needs, ensuring that all necessary information is captured right from the start.
- Preview and Save: Before finalizing changes, a preview feature allows users to review the customized form, ensuring it meets their requirements. Saving the form applies the changes, updating the ticket creation process.
Export Tickets:
This functionality provides the ability to export ticket data, facilitating analysis, reporting, and data sharing outside the platform. It supports various formats for compatibility with external tools.
The ticket feature significantly enhances service efficiency. Teams should follow this guide to manage inquiries effectively, boosting satisfaction and loyalty. Encourage your team to familiarize with the feature, systematically review saved tickets, categorize new ones, and customize ticket forms for efficiency.