To access the vendor payments page, start by locating the sidebar on the UnitaskerPro interface. Find and click on the “Vendor Payments” option. This action will direct you to the vendor payments management page where you can initiate and manage payments to vendors.
Adding Vendor Payments
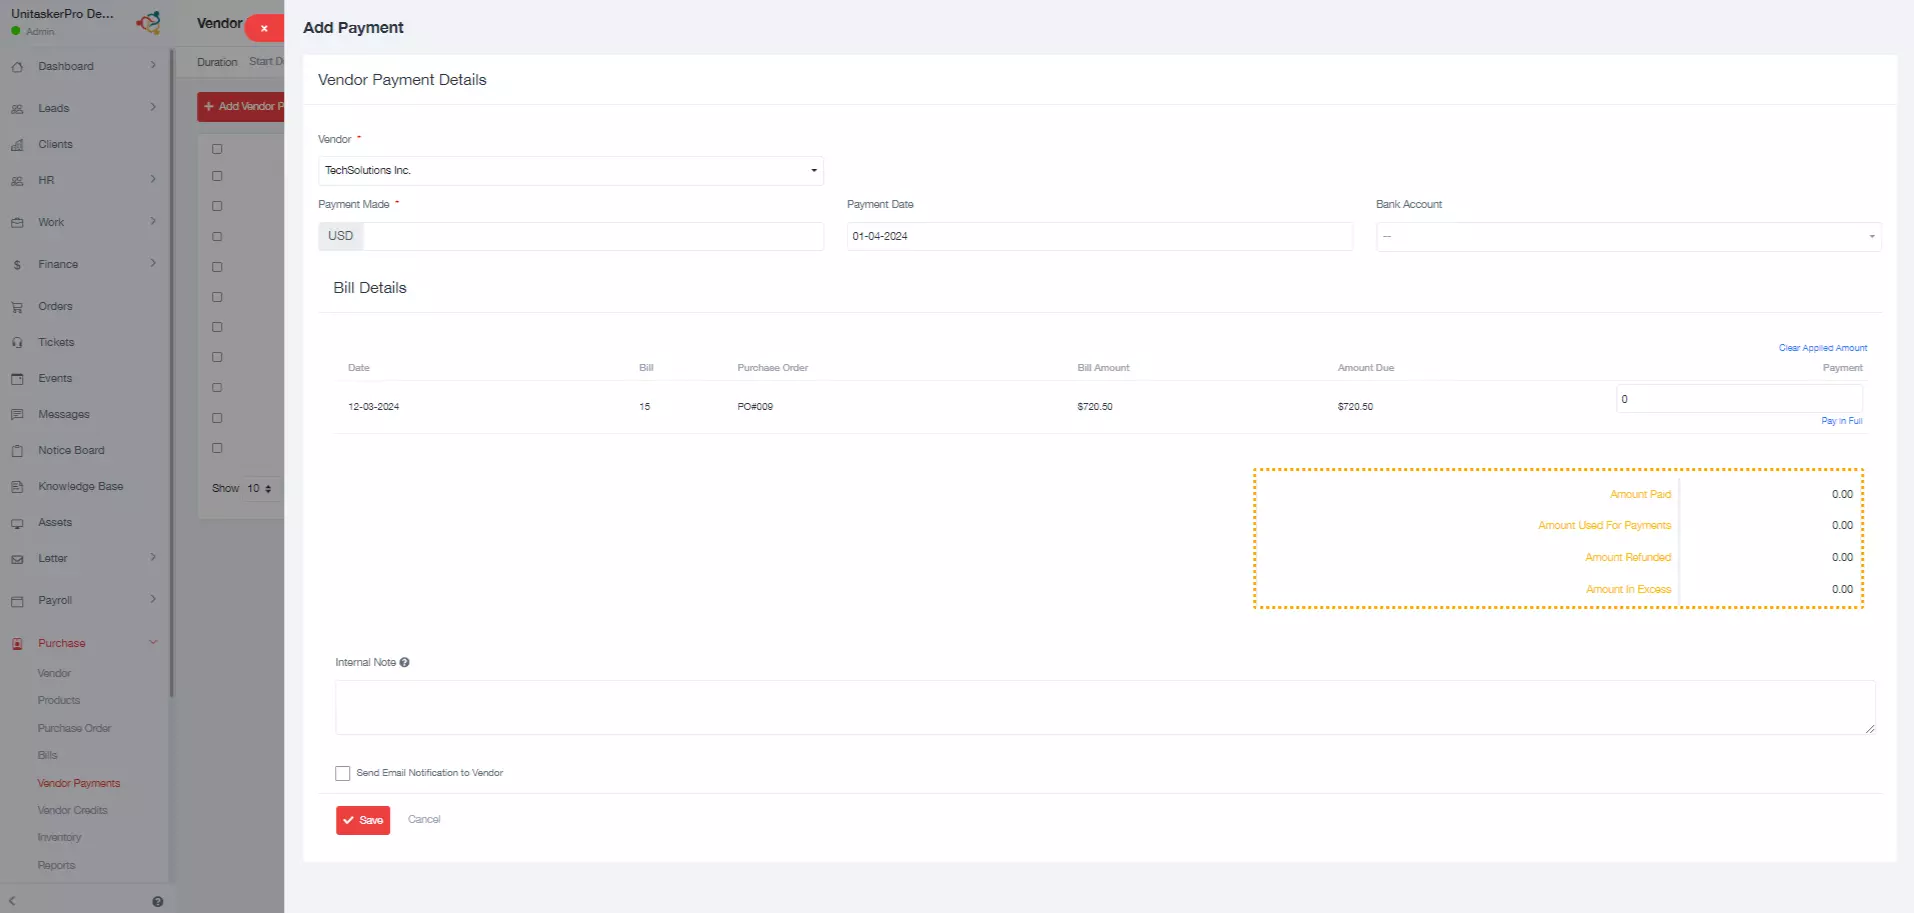
On the vendor payments management page, look for the designated button or option to add a new vendor payment. After initiating a new payment, a form will open where you can input specific details related to the payment:
Vendor: Select the vendor from which the payment is being made from a list of available vendors.
Payment Made: Specify the amount of payment made to the vendor, ensuring precision in financial records.
Payment Date: Choose the date when the payment was made to maintain accurate timelines.
Bank Account: Select the bank account from which the payment was made, ensuring proper financial tracking.
Bill Details: This section will be auto-filled with details extracted from the associated bill, including:
Date: The date of the bill.
Bill: The reference number or identifier of the bill.
PurchaseOrder: The purchase order associated with the bill.
Bill Amount: The total amount indicated on the bill.
Amount Due: The outstanding amount remaining on the bill after the payment.
Paid Amount: Specify the amount paid from the bill details, ensuring accuracy in payment allocation.
Note: Add any relevant notes or comments regarding the payment for future reference or clarification.
Save Payment:
After filling in the required information, review the details carefully to ensure accuracy. Click on the “Save” button to save the vendor payment in the system, completing the payment process.
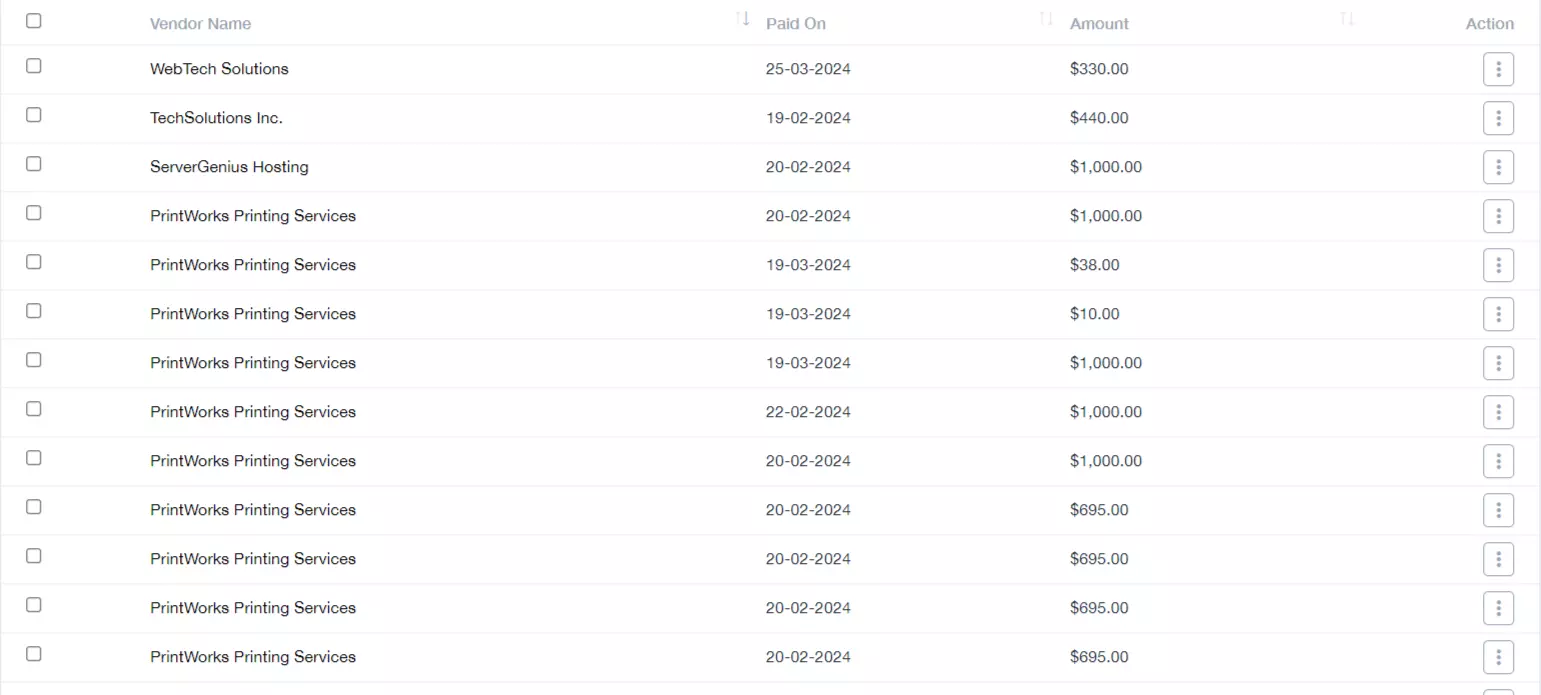
Viewing Previous Payments
On the vendor payments management page, you can easily view all previously saved payments made to vendors. Saved payments will be displayed with key information such as:
Vendor Name: The name of the vendor to whom the payment was made, providing clarity on the recipient of the payment.
Paid On: The date when the payment was made, enabling tracking in order of payment history.
Amount: The amount of the payment made, aiding in financial reconciliation and reporting.
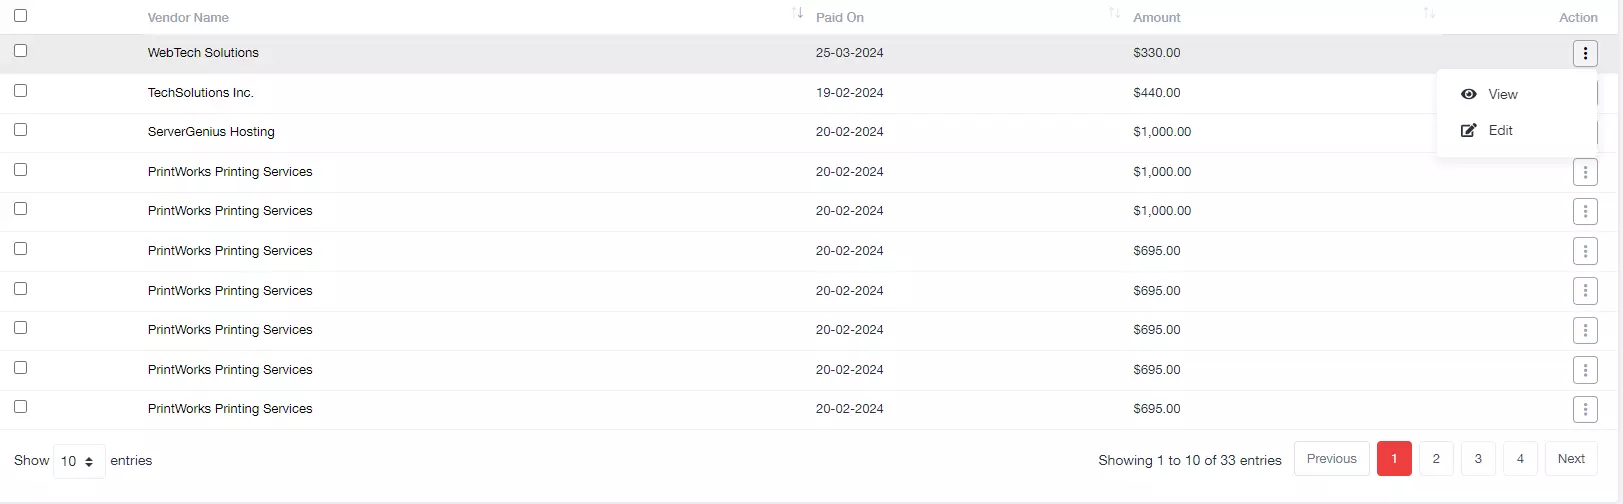
Action Buttons:
Each saved payment will have associated action buttons allowing you to:
View: Review the details of the payment, providing insights into payment specifics and associated information.
Edit: Make changes to the payment details if necessary, ensuring accuracy and completeness in payment records.