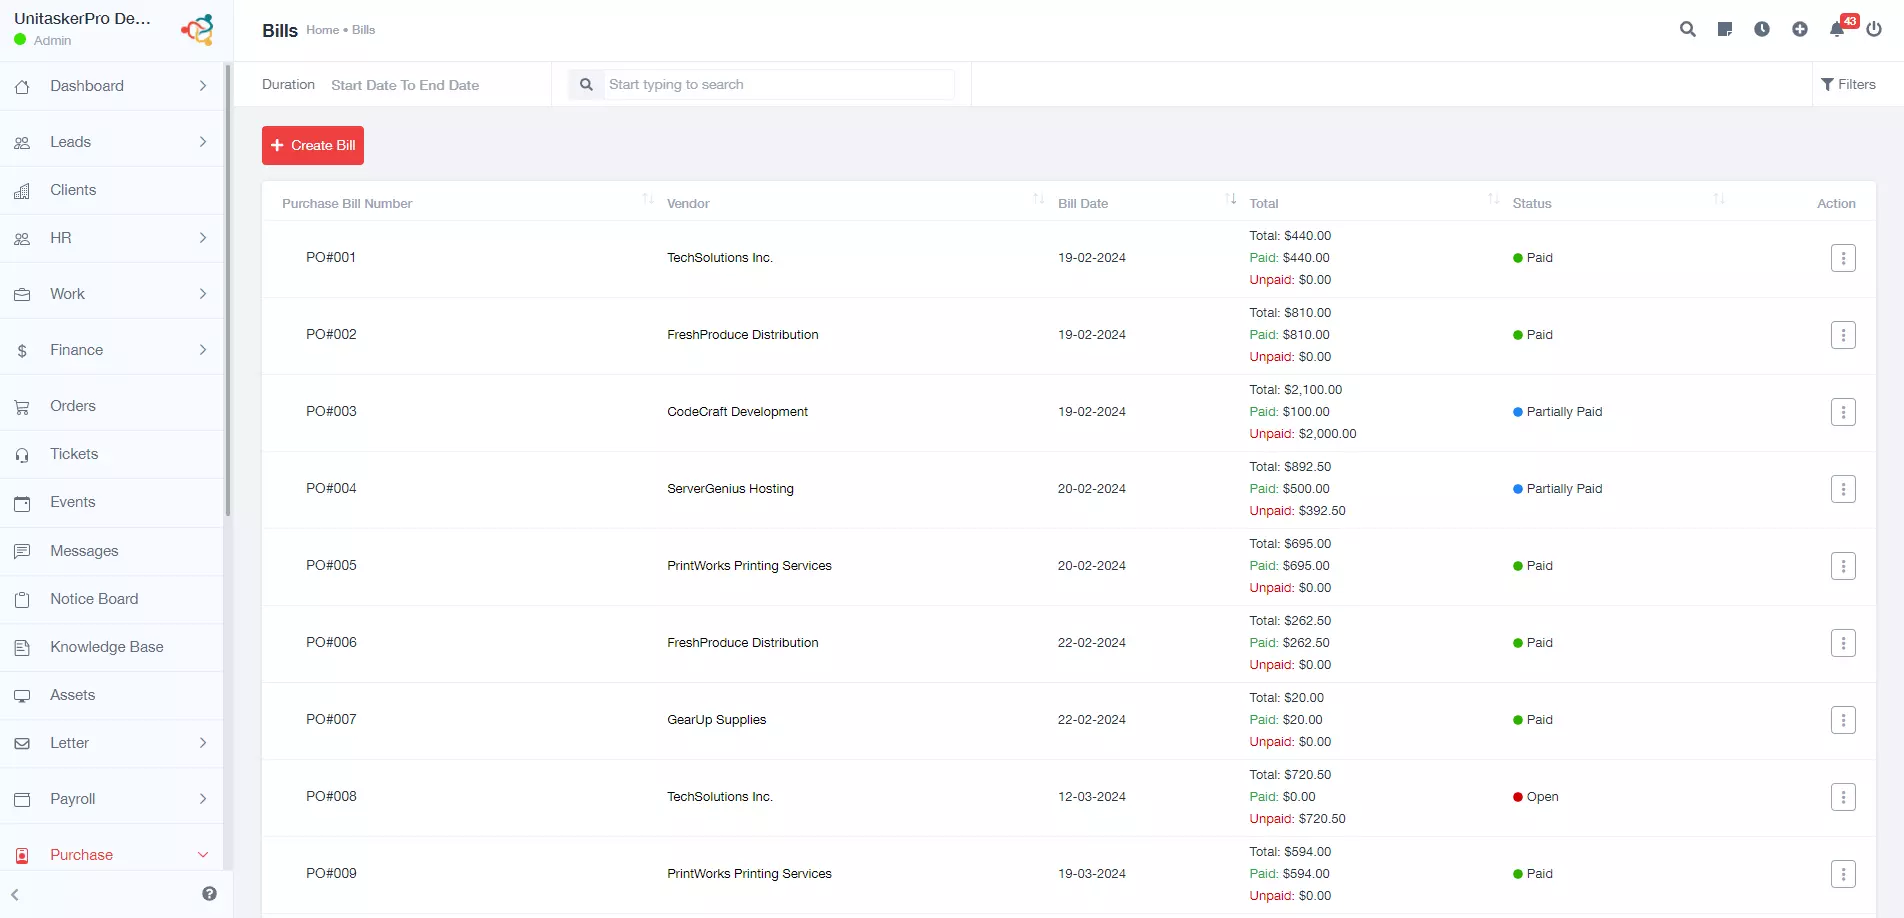
Start by navigating to the sidebar of the UnitaskerPro interface. Within the sidebar menu, find and click on the “Bills” option from the purchase module. This action will direct you to the main bills management page, where you can initiate bill-related tasks.
Creating a New Bill
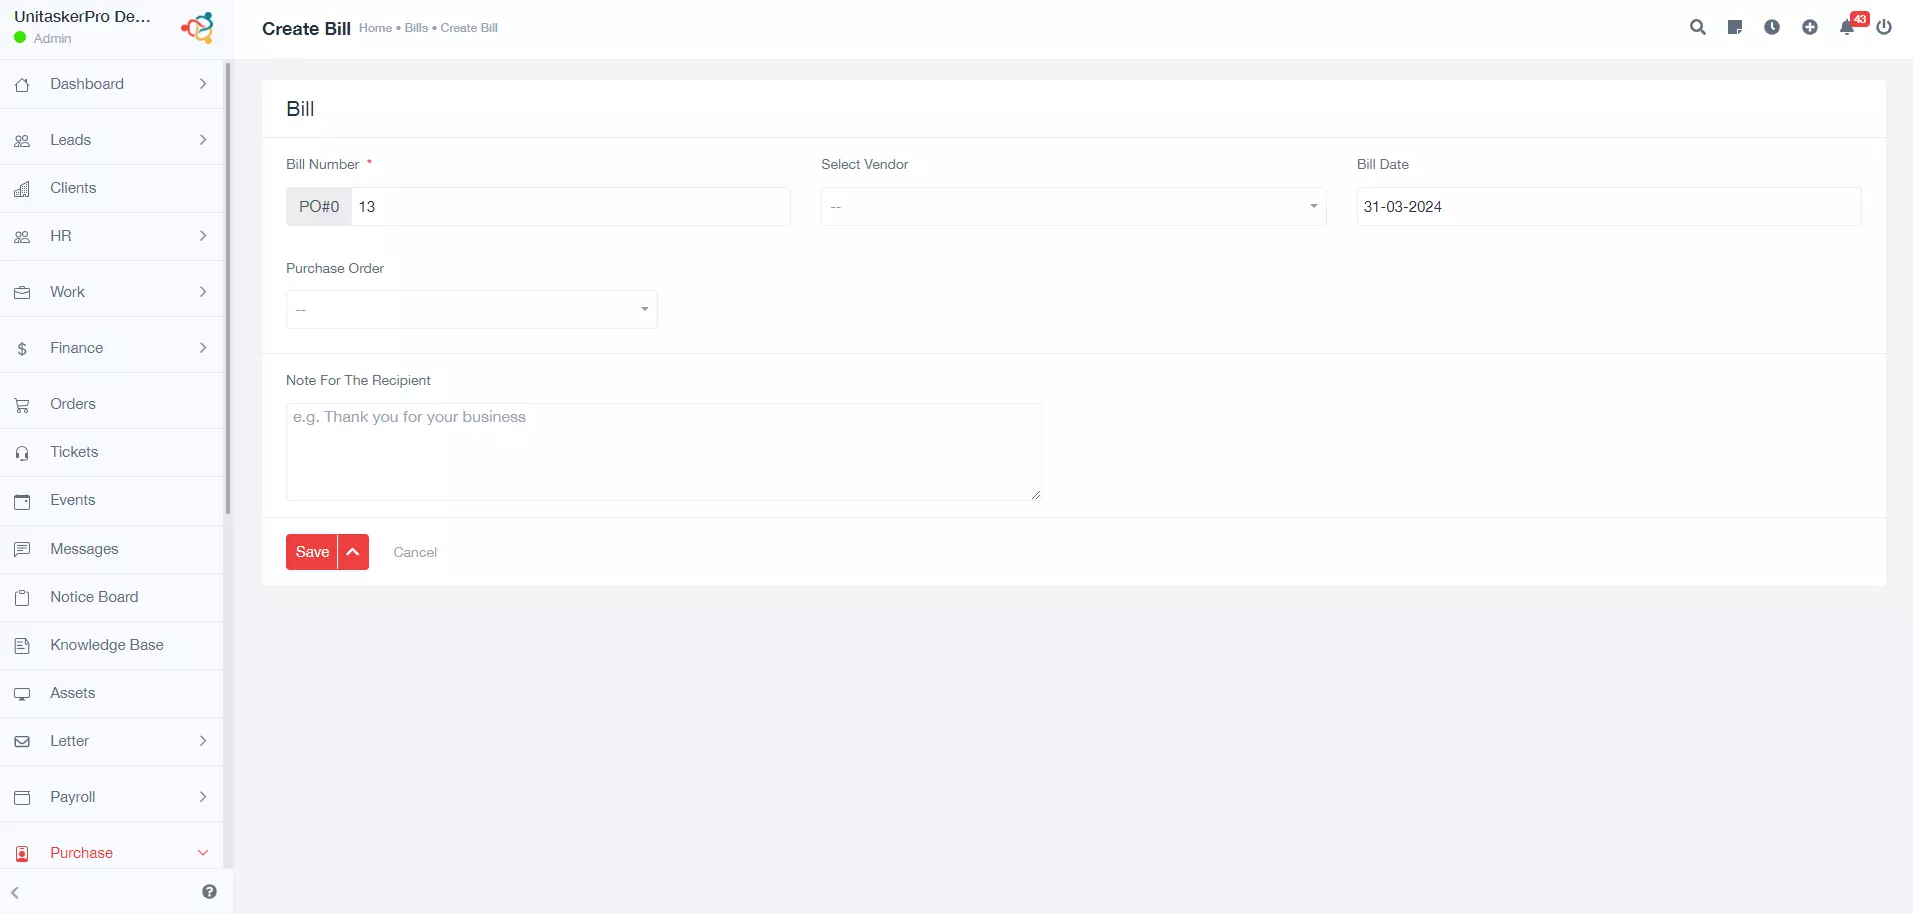
On the bills management page, locate and click on the “Create Bill” button. This action triggers the system to generate a new bill creation interface, enabling you to input bill details. These fields include:
Bill Number: This field is automatically generated and customizable. You can edit it if needed to tailor it to your preferences.
Select Vendor: Choose the vendor associated with the bill from a list of available vendors.
Bill Date: Specify the date when the bill is issued.
Purchase Order: Select a specific purchase order if applicable, facilitating better tracking and reconciliation of the bill.
Note For the Recipient: Include any additional notes or instructions for the recipient, providing clarity or special instructions.
Save Bill:
After filling in the required information, review the details carefully, ensuring accuracy and completeness. Click on the “Save” button to save the bill in the system, ensuring it is properly recorded for future reference and processing.
Managing Saved Bills
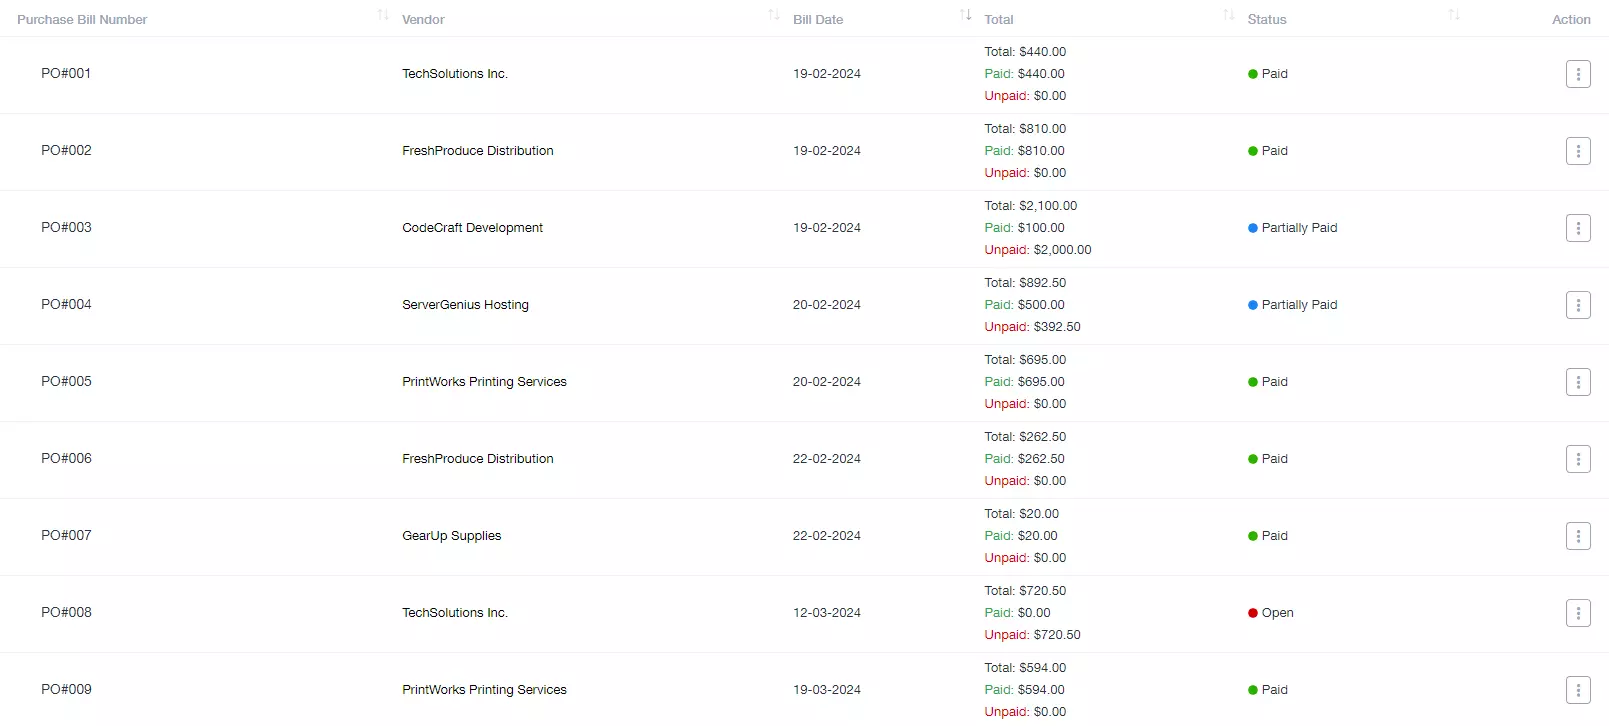
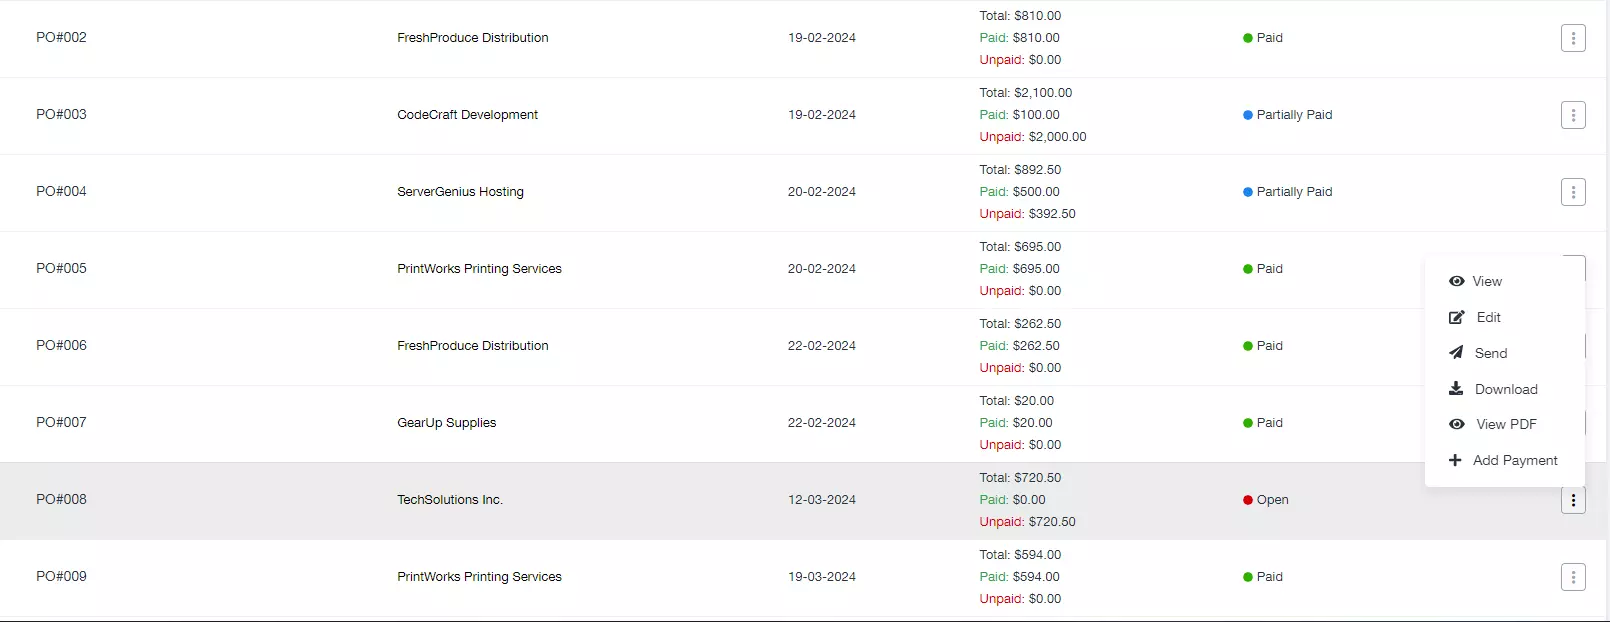
Once a bill is saved, you can easily view all saved bills on the bills management page, providing easy access to historical billing data. Saved bills will be displayed with basic details such as:
Purchase Bill Number: The unique identifier assigned to each bill allows for easy reference and retrieval.
Vendor: The name of the vendor associated with the bill, providing context for the transaction.
Bill Date: The date when the bill was created, helping to establish the timeline of financial transactions.
Total: The total amount indicated on the bill provides a quick overview of financial obligations.
Status: Indicates the status of the bill (e.g., open, paid, partially paid), facilitating tracking and monitoring of payment processes.
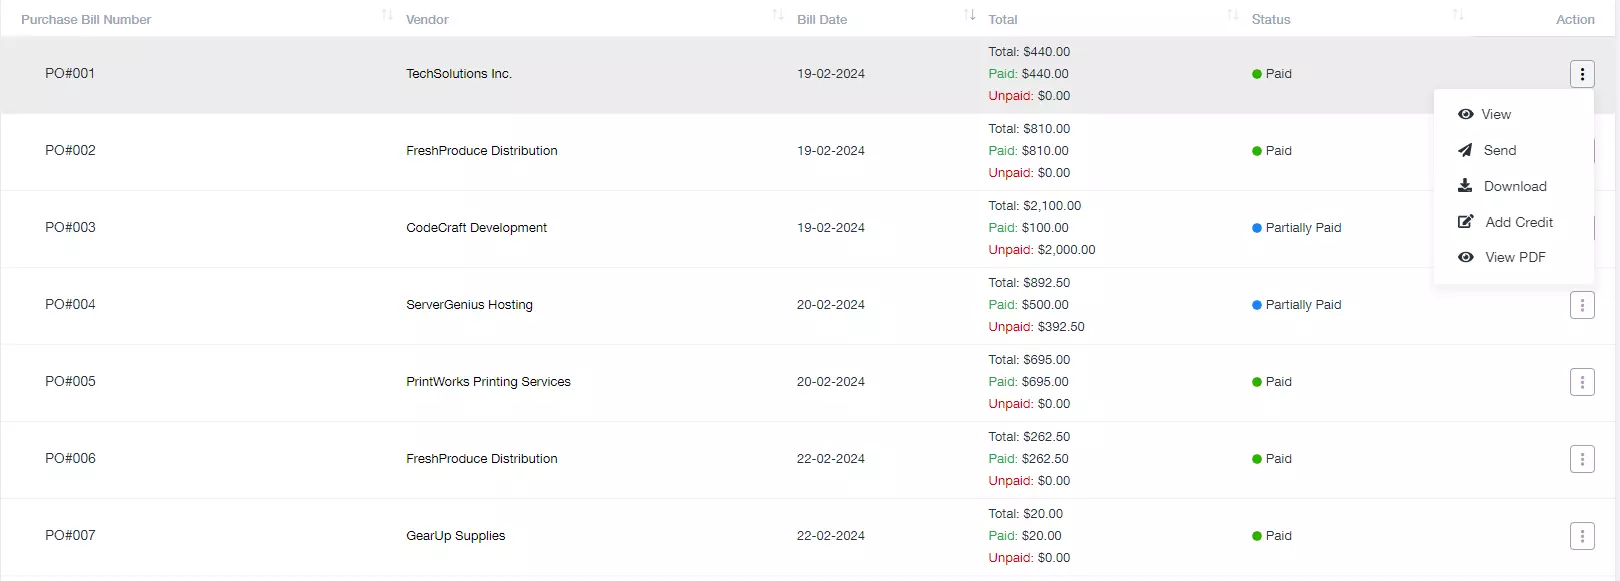
Multifunctional Actions:
Each saved bill will feature a set of multifunctional action buttons, allowing you to perform various actions such as:
View: Review the details of the bill to ensure accuracy and completeness, providing insights into transaction specifics.
Send: Send the bill to the recipient directly from the system, streamlining communication and billing processes.
Download: Download the bill for offline reference or sharing, ensuring accessibility and portability of billing documents.
View Preview: Preview the bill before sending or downloading, ensuring accuracy and proper formatting.
Add Credit: Add credit to the bill if necessary, facilitating adjustments or corrections to billing amounts.
Add Payment: In case of open bills, you can add a payment directly from this section. Click on the “Add Payment” button, and a page will open where you can input payment details without navigating to the vendor payment section, modernizing the payment process.