
Notice Board
Notice Board in UniTaskerPro
The Notice Board feature within UniTaskerPro is a versatile and powerful tool designed to facilitate smooth communication across your organization. It allows administrators, managers, and authorized personnel to post notices relevant to employees and clients. This comprehensive guide explores each aspect of the Notice Board feature, offering detailed instructions on how to maximize its utility.
Accessing the Notice Board
Start by launching UniTaskerPro on your device. Ensure you’re logged in with your credentials to access the full range of features.Look for the sidebar on the left-hand side of the UniTaskerPro interface. Locate and click on the “Notice Board” option. This action will take you directly to the Notice Board page, where you can view existing notices or add new ones.
Adding a New Notice
Creating and posting a new notice is a straightforward process. Follow these steps to ensure your notice is effectively communicated:
- Initiating Notice Creation: On the Notice Board page, you’ll find the “Add New Notice” button. Clicking this button brings up a form that you’ll need to fill out with the details of your notice.
- Defining the Audience: The first decision involves selecting the target audience for your notice. You have two options:
- Employee: Select this option if the notice is intended for internal distribution among your organization’s employees. You’ll then need to specify the department to tailor the notice to a particular group of employees or an individual employee.
- Clients: Choose this option if the notice is aimed at your clients. This ensures that the notice reaches the appropriate external audience.
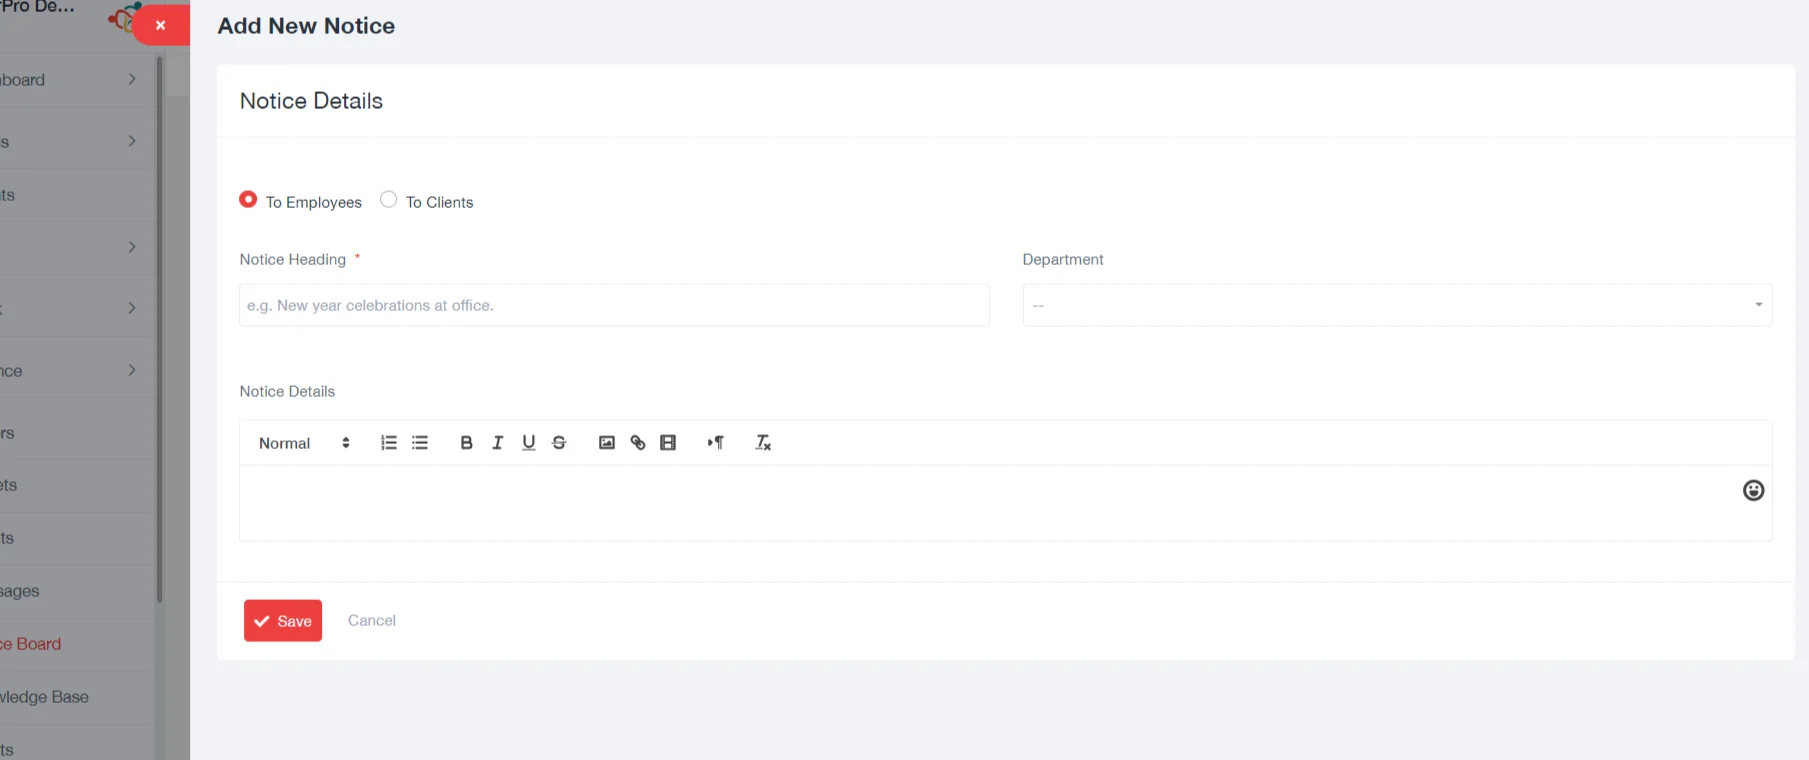
3. Filling in Notice Details: With the audience defined, proceed to fill in the essential elements of the notice:
- Notice Heading: This should be a clear and brief title that sums up the essence of the notice.
- Department (Employee): If the notice is directed at employees, select the relevant department from the dropdown menu. This field helps ensure that the notice is seen by the appropriate internal audience.
- Notice Details: Here, provides a comprehensive description of the notice. Include all relevant information that the recipients need to be aware of. Be clear and brief to ensure the message is effectively communicated.
4. Posting the Notice: After completing the form, click the “Save” button. This action posts the notice to the Notice Board, making it visible to the selected audience.
Exporting Notices
Users also have the option to export notices for record-keeping or distribution purposes. Simply locate the export feature within the Notice Board interface to generate a report containing the list of notices.
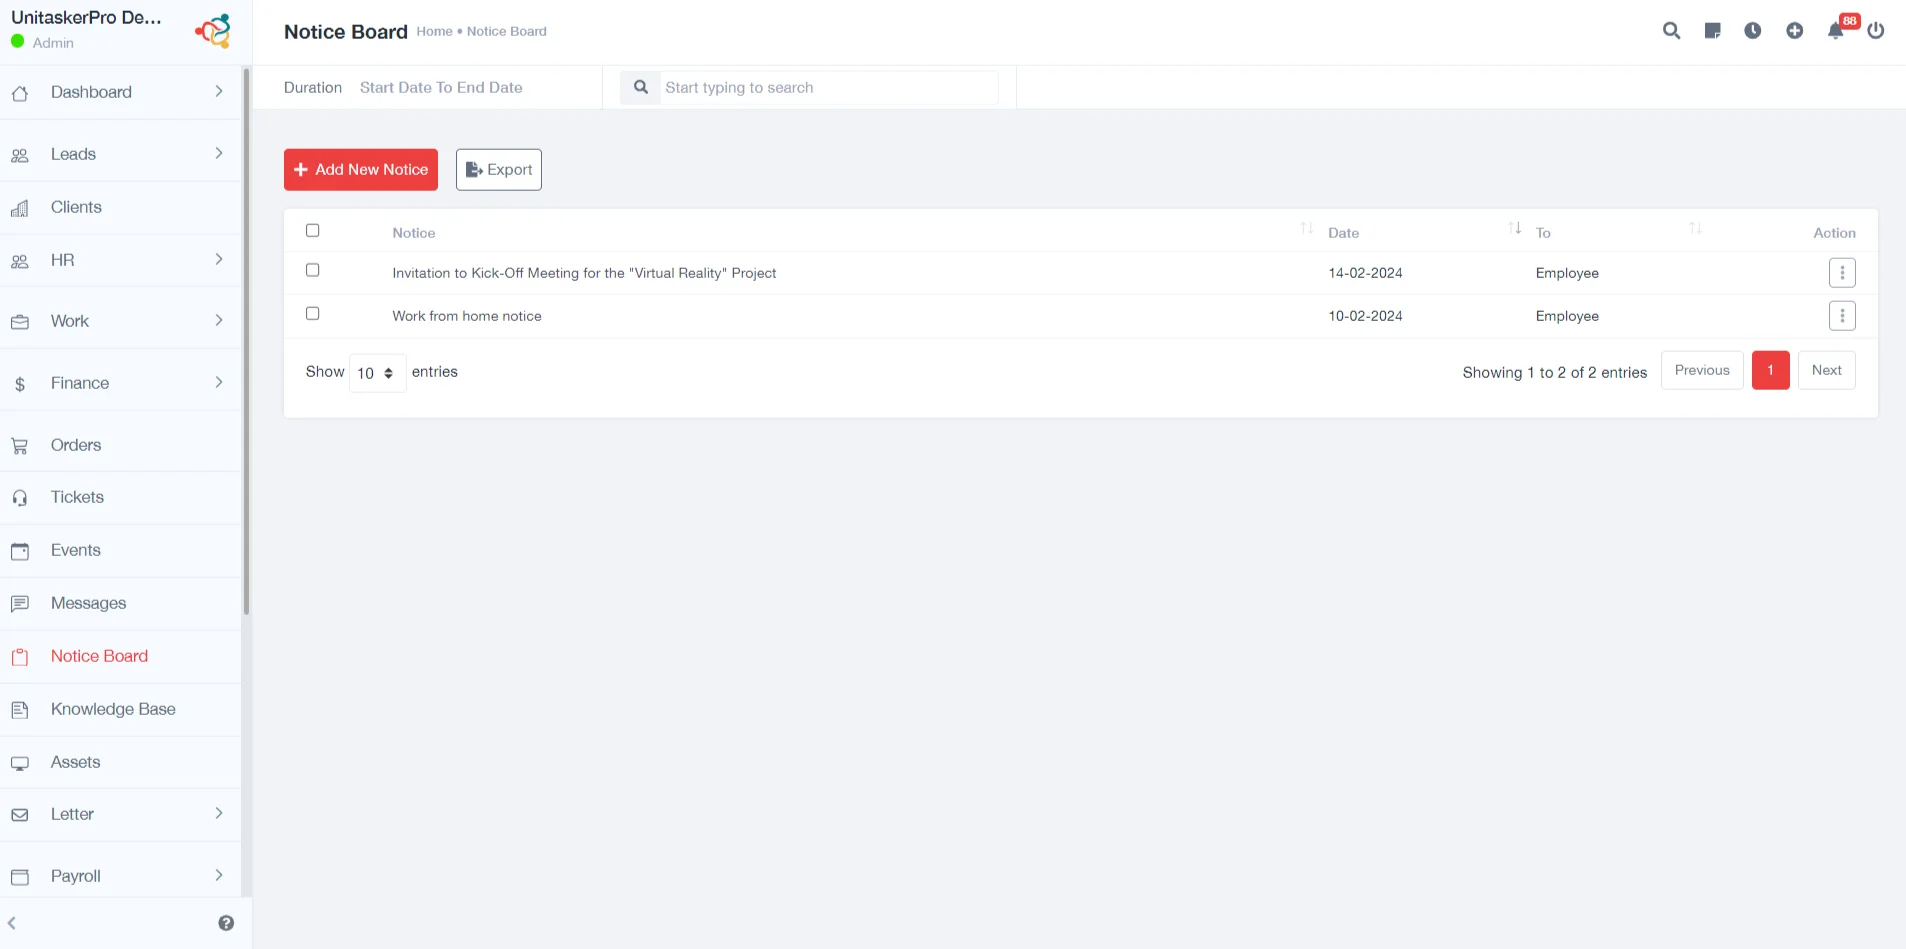
Viewing and Managing Notices
After posting notices, users can view and manage them on the Notice Board. Each notice entry contains basic information such as the notice title, the date it was posted, the intended recipients (employees or clients), and action buttons for further interactions. These actions include:
- View: Allows you to read the full details of the notice.
- Edit: Enables you to modify the notice contents or target audience.
- Delete: Removes the notice from the board.

The Notice Board is an essential feature for maintaining open lines of communication within your organization and with your clients. By following these detailed steps, you can effectively manage notices, ensuring that all parties stay informed about important updates and announcements.