
Expenses
Expense Management in UniTaskerPro
Inside the finance section, find and click on the “Expenses” tab. This action will direct you to the expense management area, where you can add, view, and manage your expense records.
Adding Expenses
Click on the “Add Expense” button, displayed within the Expenses tab. This action opens a comprehensive form designed for entering all relevant details of a new expense. Now complete the Expense Form with Detailed Information:
- Item Name: Describe the item or service acquired.
- Currency: Select the currency in which the transaction was made. UniTaskerPro supports multiple currencies, facilitating global transactions.
- Exchange Rate: If the transaction involves currency conversion, provide the exchange rate to accurately reflect the expense in your primary currency.
- Price: Enter the total cost of the expense. Include all relevant costs such as taxes, shipping, or additional fees to ensure accurate financial tracking.
- Purchase Date: Specify the date on which the expense occurred.
- Employee: If the expense is associated with a specific employee, select their name from the dropdown list. This allows for tracking and reimbursing employee expenses.
- Project: Link the expense to a project if applicable. This helps in allocating project costs and budget management.

- Expense Category: Categorize the expense for organized financial reporting.
- Purchased From: Note the vendor or service provider.
- Bank Account: Indicate the bank account used for the transaction.
- Description: Provide any additional details or context about the expense.
- Bill : Attach a digital copy of the bill, invoice, or receipt. This documentation is essential for verifying transactions and may be required for tax purposes.
- Saving: Ensure all details are correct and click the “Save” button. This records the expense in UniTaskerPro’s database, making it available for tracking and reporting.
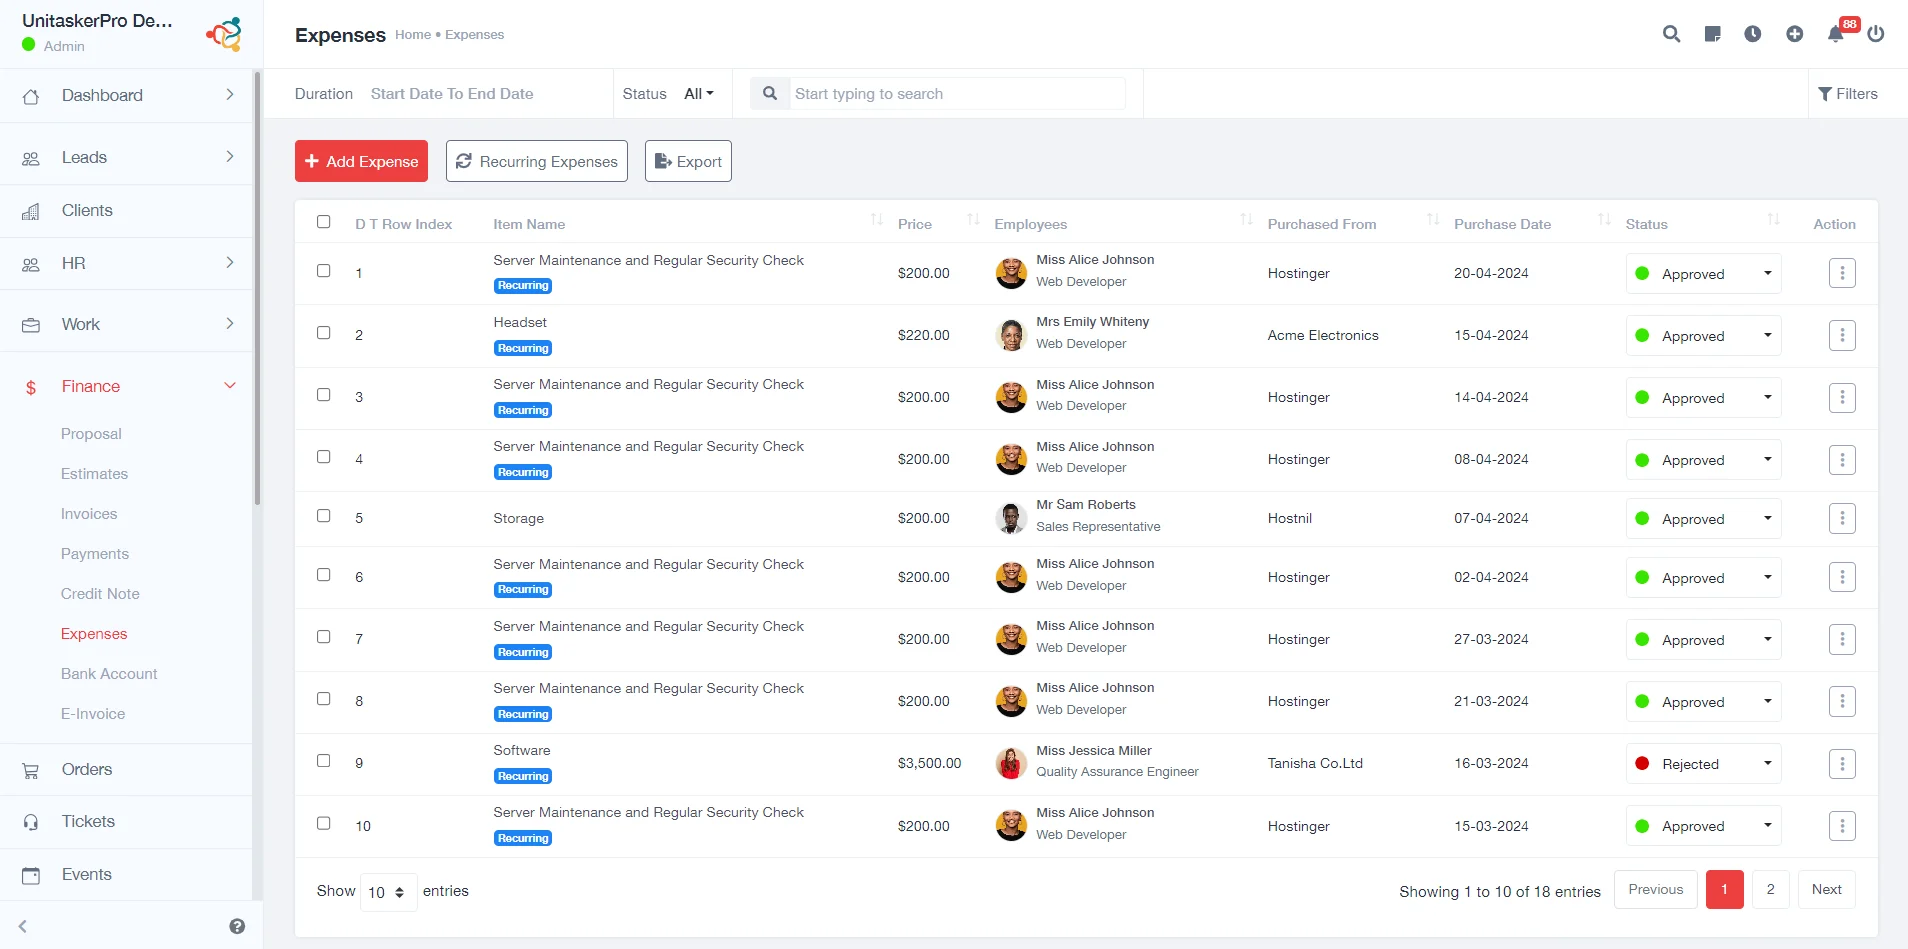
Viewing Expenses
The expenses page displays a comprehensive list of all expenses entered into the system. Each entry in the expense list provides essential details about the financial transactions. Below is an explanation of each piece of information available:
- Item Name:The name or description of the purchased item or service.
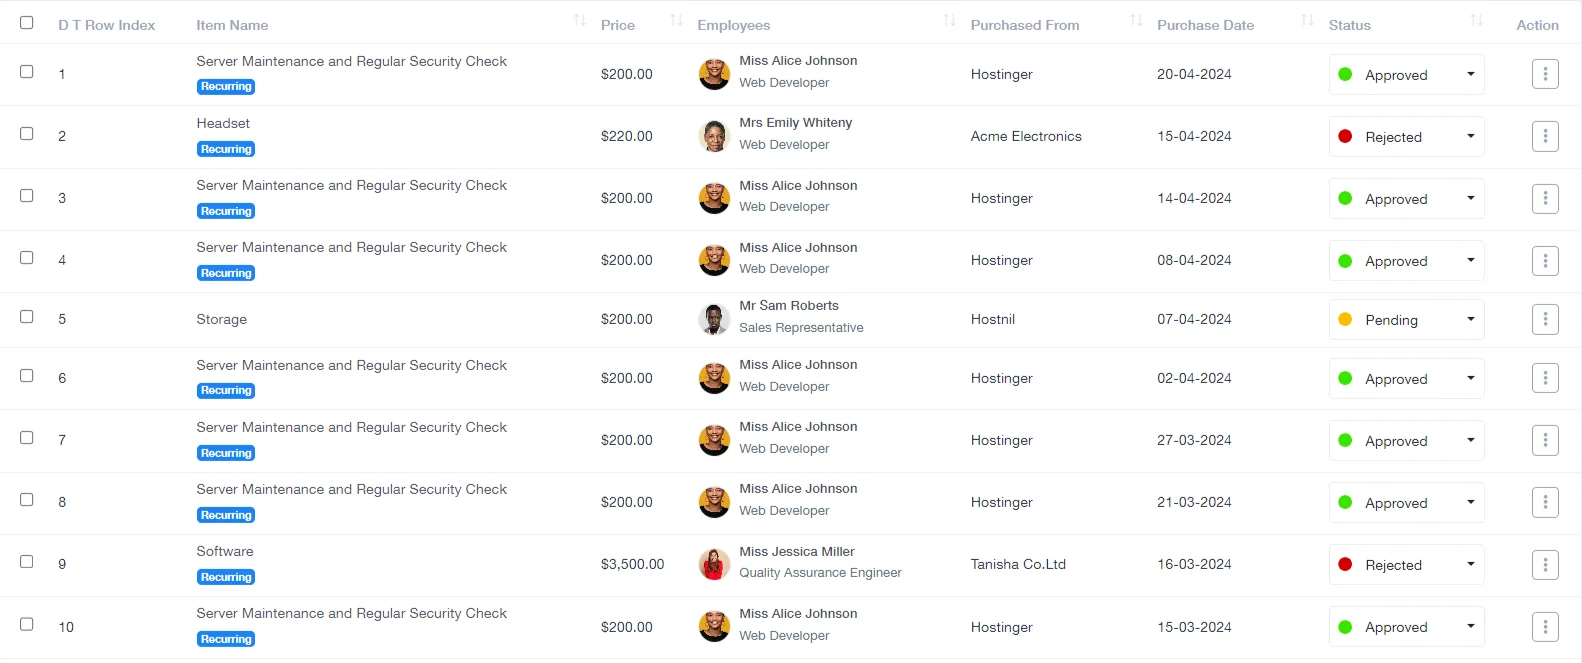
- Employee:The name of the employee associated with the expense, if applicable.
- Price:The total amount paid for the expense.
- Purchased From:The vendor or service provider from whom the item or service was purchased.
- Purchase Date: The date on which the expense was incurred.
- Status: The current status of the expense, such as pending approval, approved, or reimbursed.
Recurring Expenses
Click on the “Add Recurring Expense” button. This button is typically positioned in a prominent area to facilitate easy access. Upon clicking the button, a detailed form will appear, designed to capture all pertinent information about the recurring expense.Required Information for Recurring Expenses
- Item Name: Clearly specify the name of the expense.
- Currency: Select the currency in which the expense is incurred.
- Price: Enter the amount of the expense. This should be the regular amount paid for each recurrence of the expense.
- Employee: If the expense is directly associated with an employee, such as a monthly stipend or reimbursement, select the appropriate employee from the dropdown list.
- Project: For expenses tied to specific projects, indicating the project helps in allocating costs accurately and managing project budgets effectively.
- Bank Account: Choose the bank account from which the recurring expense will be paid.
- Expense Category: Assign the expense to a category, such as utilities, subscriptions, or rent.
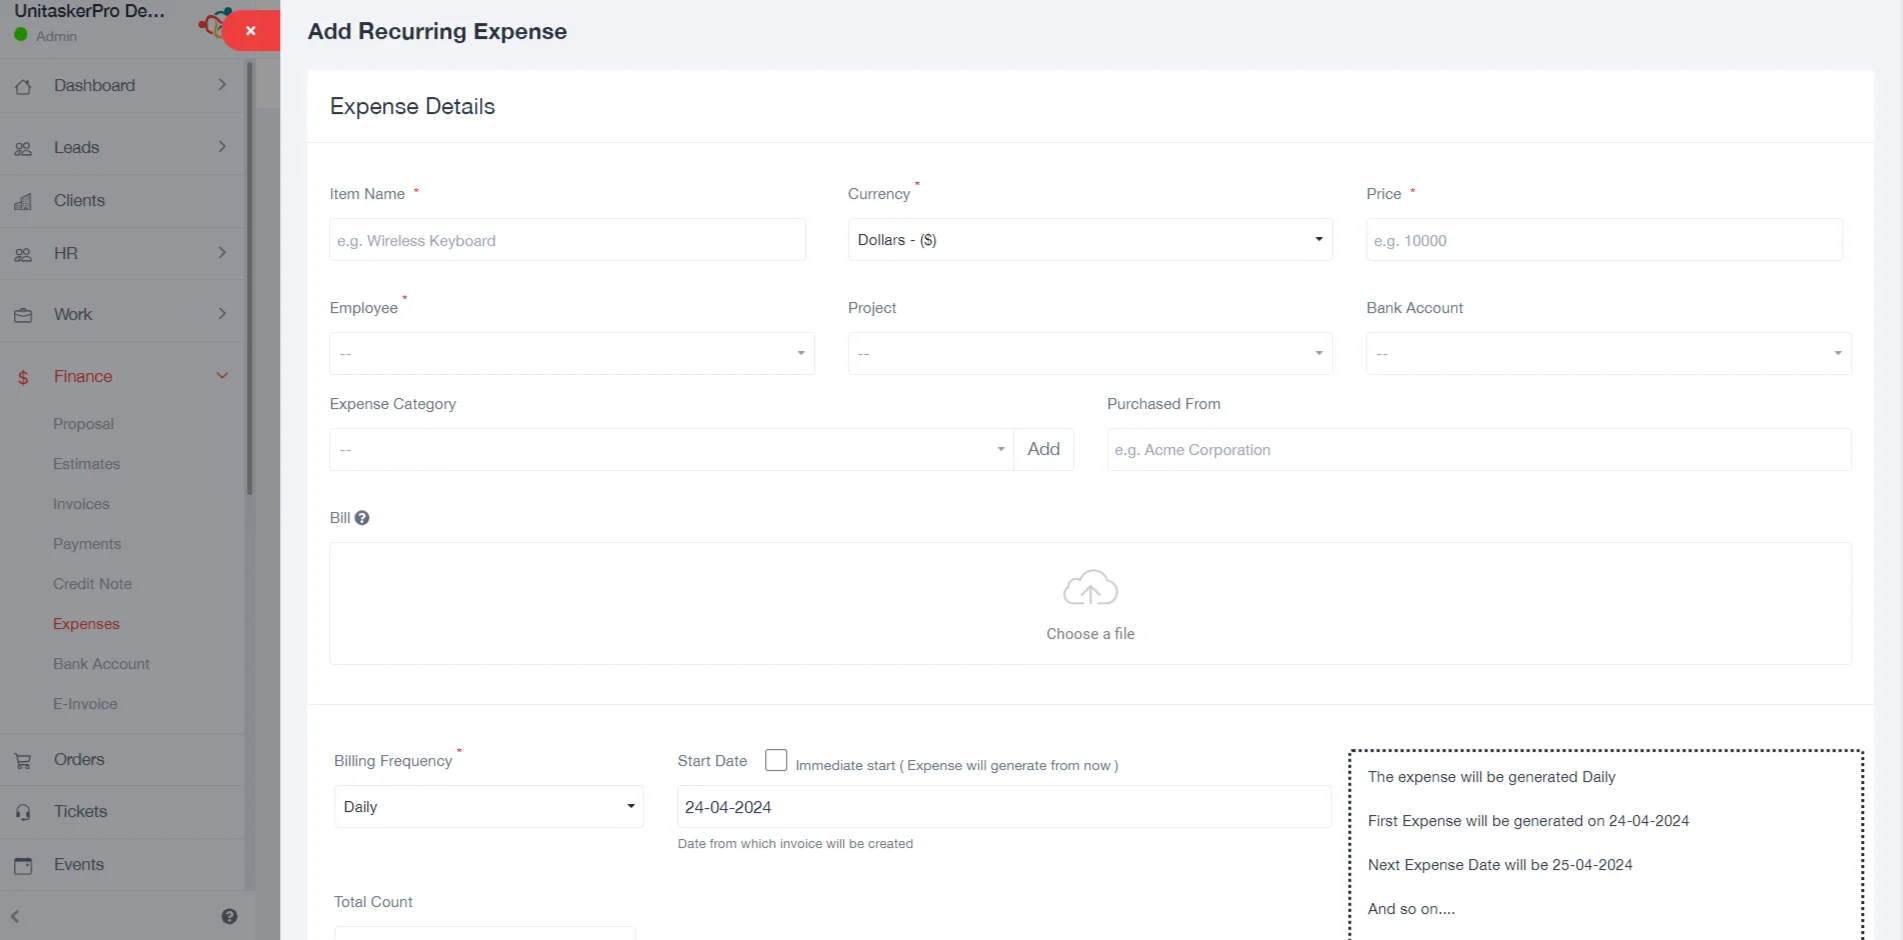
- Purchased From: Identify the vendor or service provider. This is crucial for contact and negotiation purposes, as well as for verifying services received.
- Bill: Attach any relevant documents or invoices that pertain to the recurring expense.
- Save:After carefully filling out the form with all necessary details, review the information to ensure accuracy and completeness. Click on the “Save” button to finalize the entry.
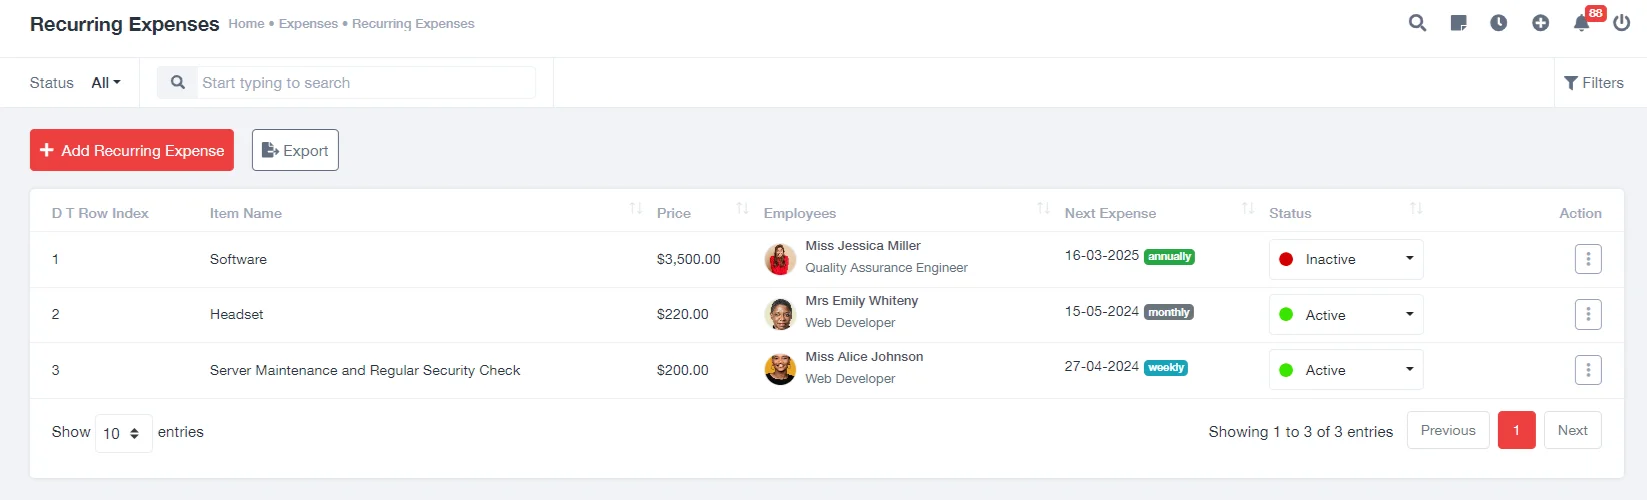
Viewing Recurring Expenses
Recurring expenses can be viewed in a dedicated section within the Expenses area. This section provides a comprehensive overview of all scheduled recurring payments.Key Information Displayed for Recurring Expenses are:
- Item Name: The name of the recurring expense, facilitating quick identification.

- Price: The amount of each recurrence, essential for financial planning and analysis.
- Employee: Indicates if the expense is associated with a specific employee, useful for HR and accounting purposes.
- Next Expense Date: Shows when the next payment or charge is expected, helping in cash flow forecasting.
- Status: The current status of the recurring expense, such as active, paused, or completed. Exporting Expenses
Exporting Expense
UniTaskerPro’s expenses section includes an export feature, allowing you to download expense data for external analysis or reporting.Choose your preferred format (CSV, Excel, etc.) for the export. After selecting the desired format and any other export options, click on the export button. Your expense data will be downloaded to your device, ready for use in reports, presentations, or financial analyses.