
Bank Account
Log in to your UniTaskerPro and locate the Finance Module on the sidebar and click on the “Bank Account” option. This action will redirect you to the Bank Account Management page, where you can view existing accounts or add new ones.
Adding a New Bank Account
The process of adding a new account is designed to be intuitive and efficient, whether it’s a bank or cash account.On the Bank Account Management page, you’ll find the “Add Bank Account” button. Clicking this button opens a form dedicated to capturing all necessary details for the new account. Enter Account Details. For this:
- Type: Select “Bank” to indicate you’re adding a bank account. This differentiation is crucial for categorizing your accounts accurately within the system such as bank or cash.
For Bank:
When managing financial information, especially in a business or personal finance software, it’s essential to have a comprehensive and organized way to record all details of your banking accounts.To facilitate this, a detailed form can be used to capture all the critical information about each bank account you own or manage. Here’s what you need to fill out in the form:
- Bank Information: Fill in the name of the bank where the account is held
- Account Holder Name: Provide the name under which the account is registered
- Account Number: The unique identifier for the account within the bank. This is critical for transactions and account identification.
- Account Type: Describe the account (e.g., Savings, Checking) to clarify its purpose and features.
- Currency: Specify the currency the account operates in, aiding in financial consolidation and reporting.
- Contact Number: A phone number associated with the account for banking queries or contact purposes.

- Opening Balance: The initial amount in the account at the time of setup.
- Status: Indicate whether the account is active or inactive, allowing for proper management and reporting.
- Bank Logo: An optional field where you can upload a visual representation of the bank, enhancing visual identification and categorization.
- Save :After completing the form with all the necessary details, click on the “Save” button.
For Cash:
The process mirrors that of adding a bank account, with emphasis on selecting “Cash” as the type. This distinction is crucial for recognizing the account as a cash reserve rather than a traditional bank account. The rest of the details should be filled out similarly, focusing on the unique characteristics of cash accounts.
- Account Type (Cash): This selection differentiates the account from other types such as bank accounts, credit accounts, etc. This setting indicates that the transactions you’ll be recording are cash-based, influencing how transactions are managed and reported.
- Account Holder Name: This field is for entering the name of the individual or entity that owns the cash account.
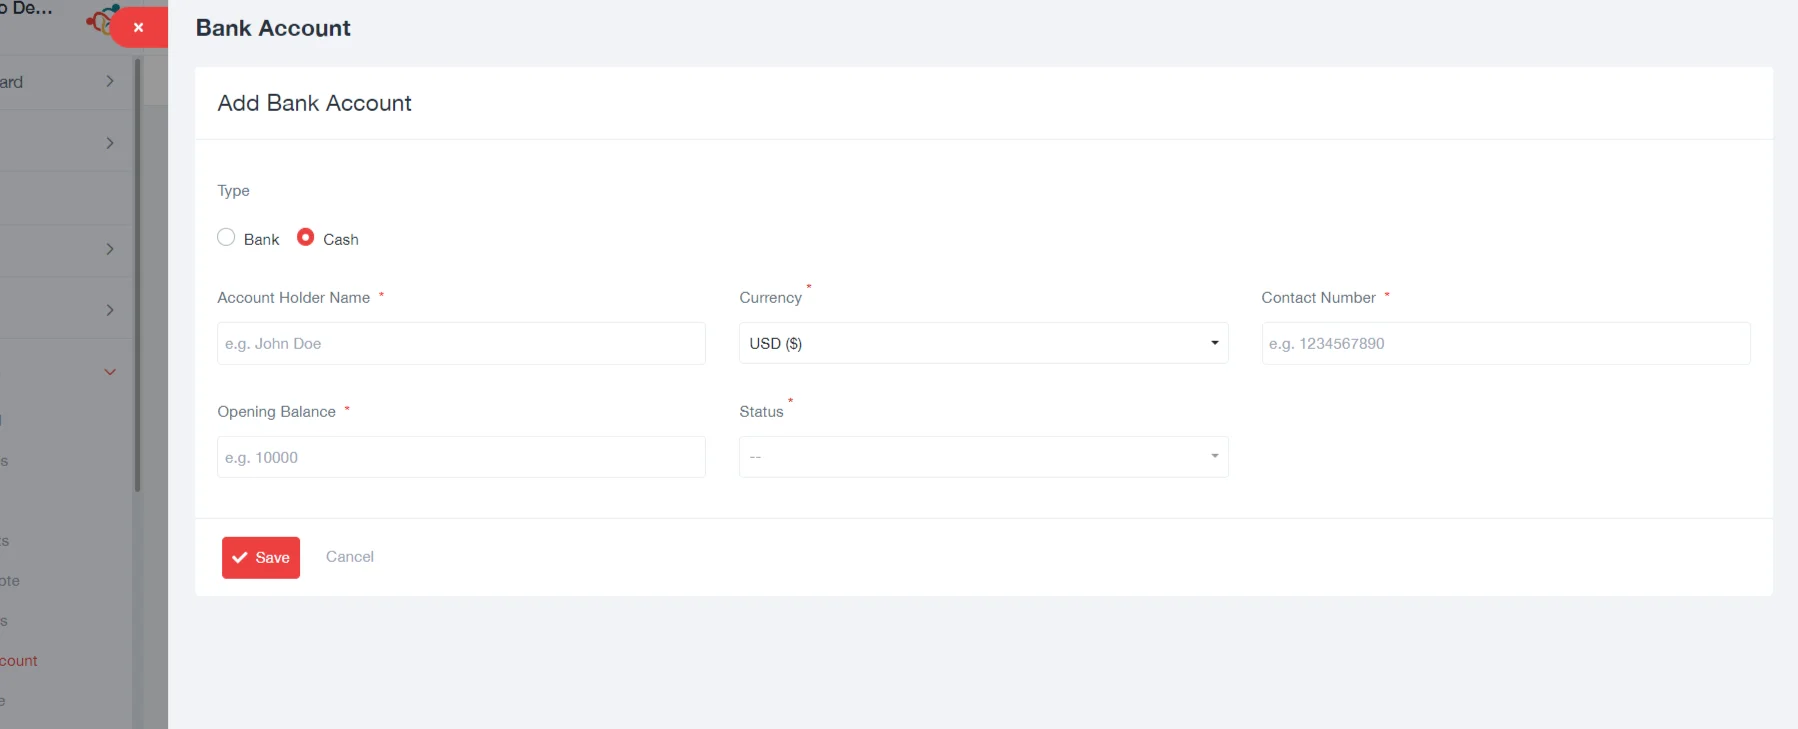
- Currency: Specifies the currency in which the cash transactions will be recorded.
- Contact Number: This might be the telephone number of the account holder.
- Opening Balance: Represents the initial amount of cash available in the account at the time of its creation.
- Status (Active/Inactive): This setting indicates whether the cash account is currently in use (Active) or not being used (Inactive). Active accounts are those that are regularly used for transactions, while inactive accounts might be temporarily unused or permanently closed but kept in records for historical purposes.
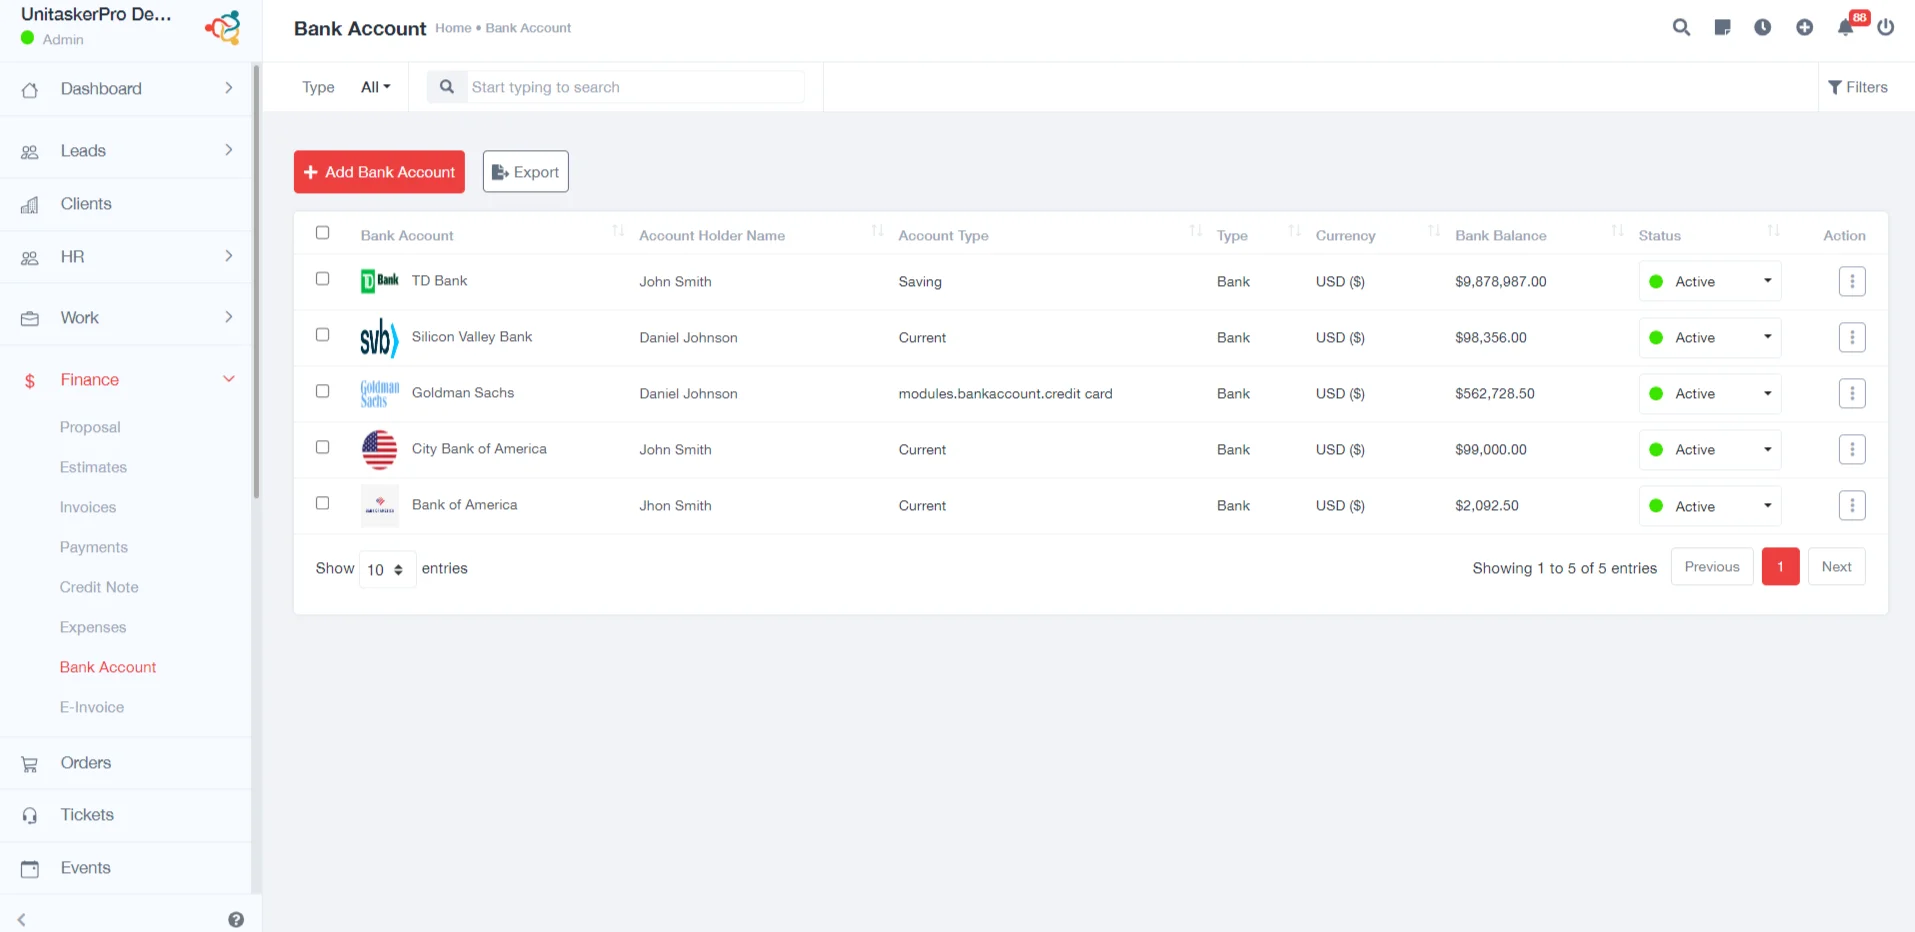
Viewing and Managing Bank Accounts
Upon saving a new bank or cash account, the system typically redirects you to a comprehensive list or dashboard where all your accounts are displayed. This section provides a snapshot of each account, highlighting essential details:
- Bank Account: Shows the unique identifier or name you’ve assigned to the account for easy identification.
- Account Holder Name: Displays the name of the individual or entity that owns the account, ensuring clarity on ownership.
- Account Type: Indicates whether it’s a savings, checking, business, or other types of account, which can affect how transactions are processed.
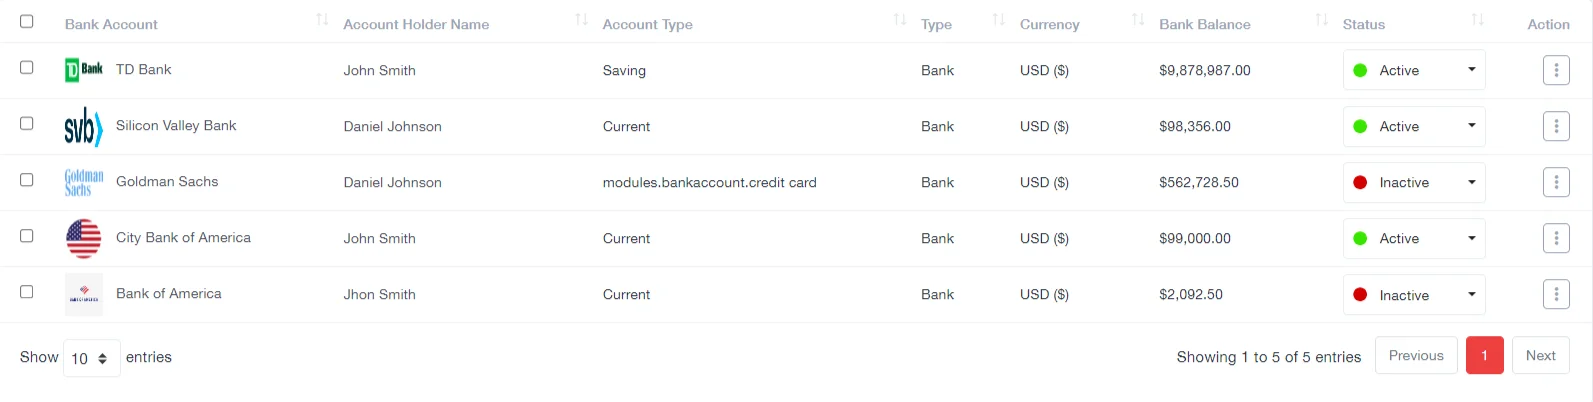
- Type: Distinguishes between bank and cash accounts, helping in organizing and managing different kinds of financial assets.
- Currency: Lists the currency in which the account operates, critical for managing multi-currency transactions.
- Bank Balance: Provides a current snapshot of the account’s balance, essential for financial oversight and planning.
- Status: Shows whether the account is active, inactive, or in another status, which affects its availability for transactions.
Actions Available:
Next to each account entry, there are typically action buttons or links that allow you to manage the account directly from the list. These actions include:
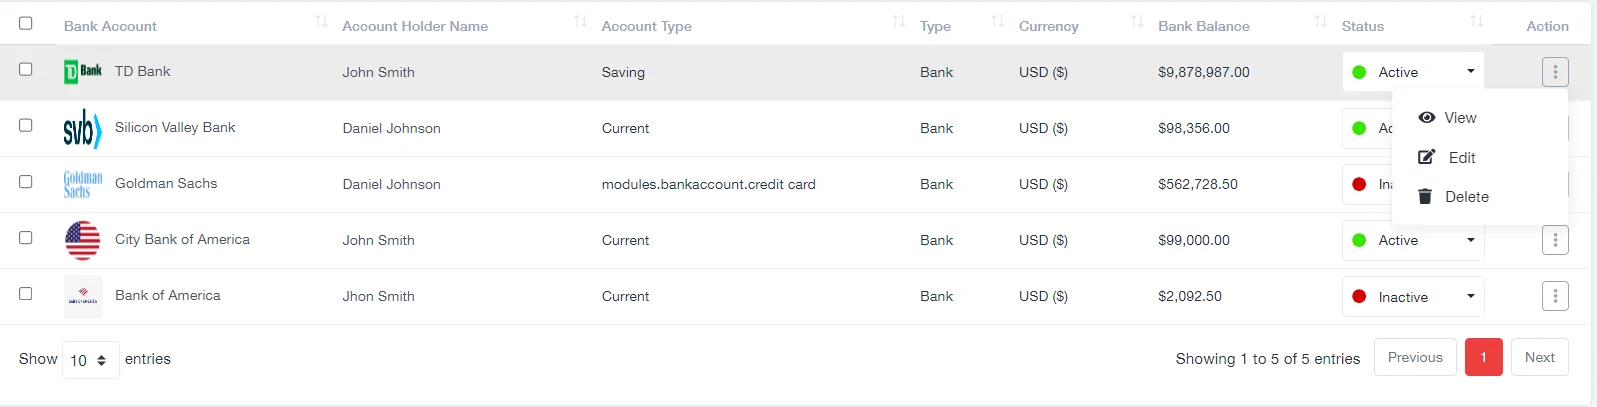
- View: Clicking on an account allows you to see more detailed information, offering insights into transactions, balances, and account history.
- Edit: Should any account details change or need correction, the edit function allows you to update information, ensuring your records remain accurate.
- Delete: For accounts that are no longer in use or were added in error, the delete option removes them from your system, keeping your account list current and manageable.
Export:
UniTaskerPro’s export feature enables you to download account information for external use or analysis. Whether you need a hard copy for review, or digital data for integration with other financial systems, this function supports a range of formats to meet your requirements.