Asset
Asset Management
The Asset Management feature in UniTaskerPro is designed to simplify the process of managing your organization’s assets efficiently. This feature allows users to add, view, edit, and track assets within a unified platform. This documentation will guide you through utilizing the Asset feature, from navigating to the asset management page to adding new assets and performing various actions on them.
Accessing the Asset Management Page
Navigate to the Asset Section
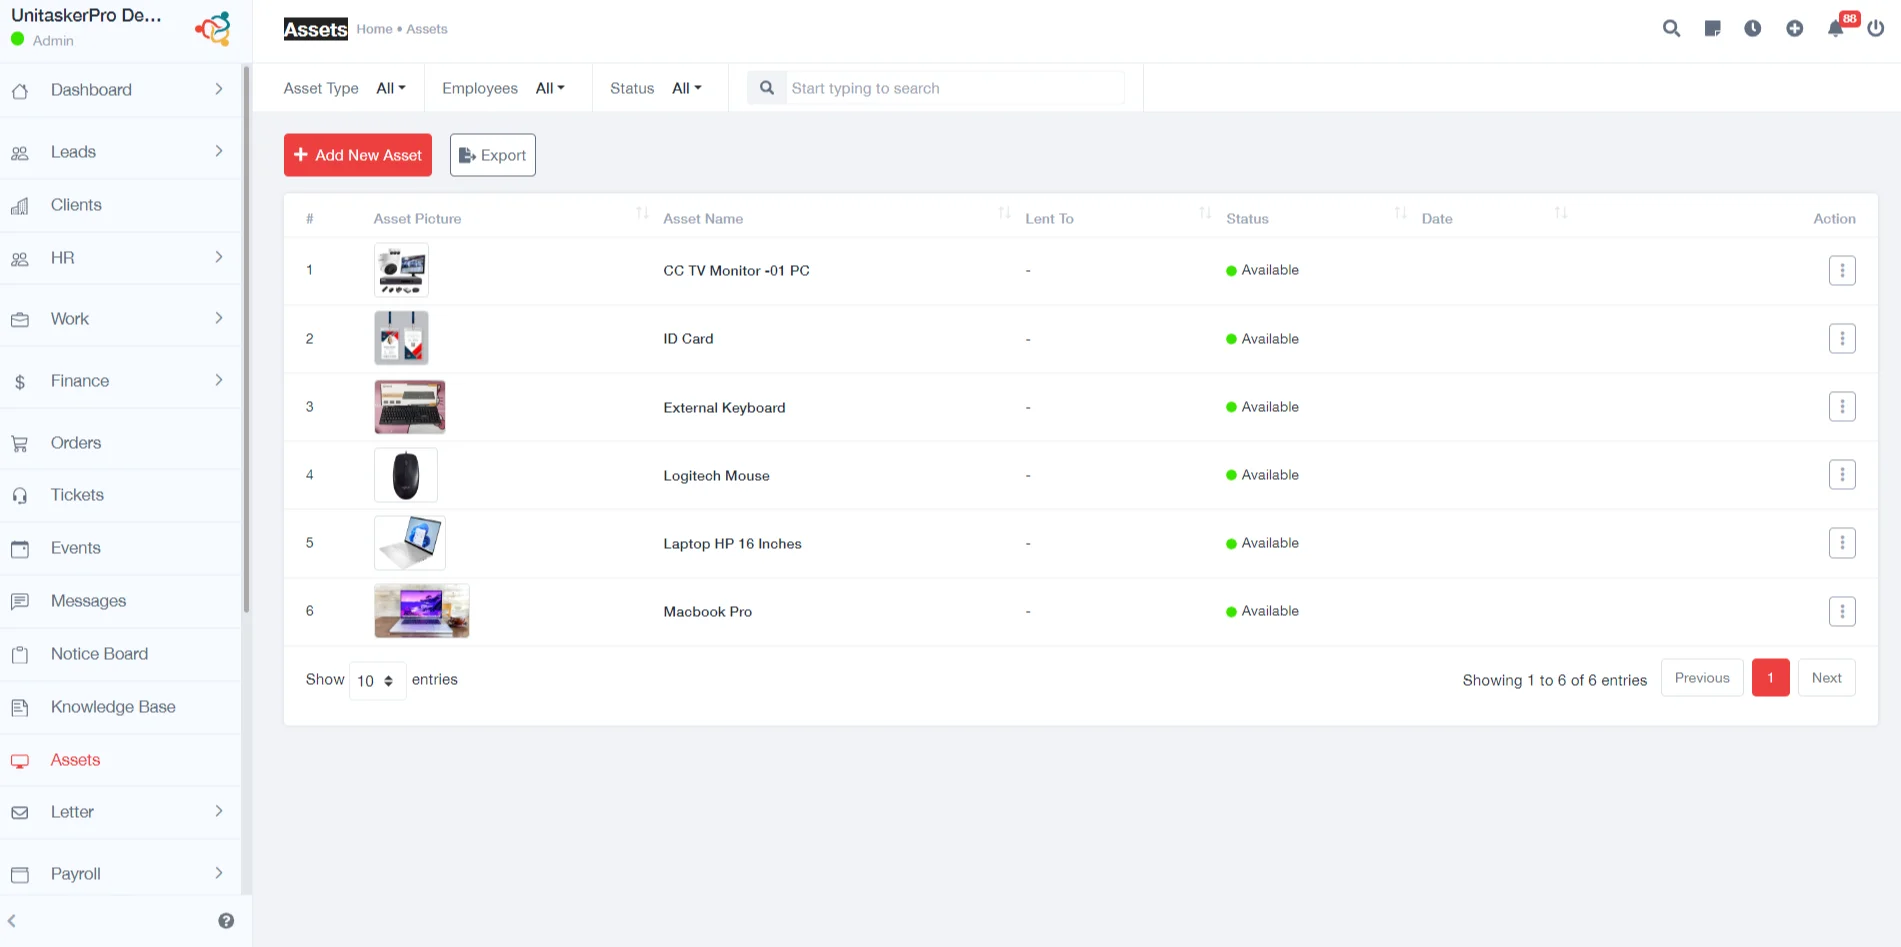
Start by clicking on the ‘Asset’ option in the UniTaskerPro interface’s sidebar. This action will redirect you to the Asset Management page.
Adding New Assets
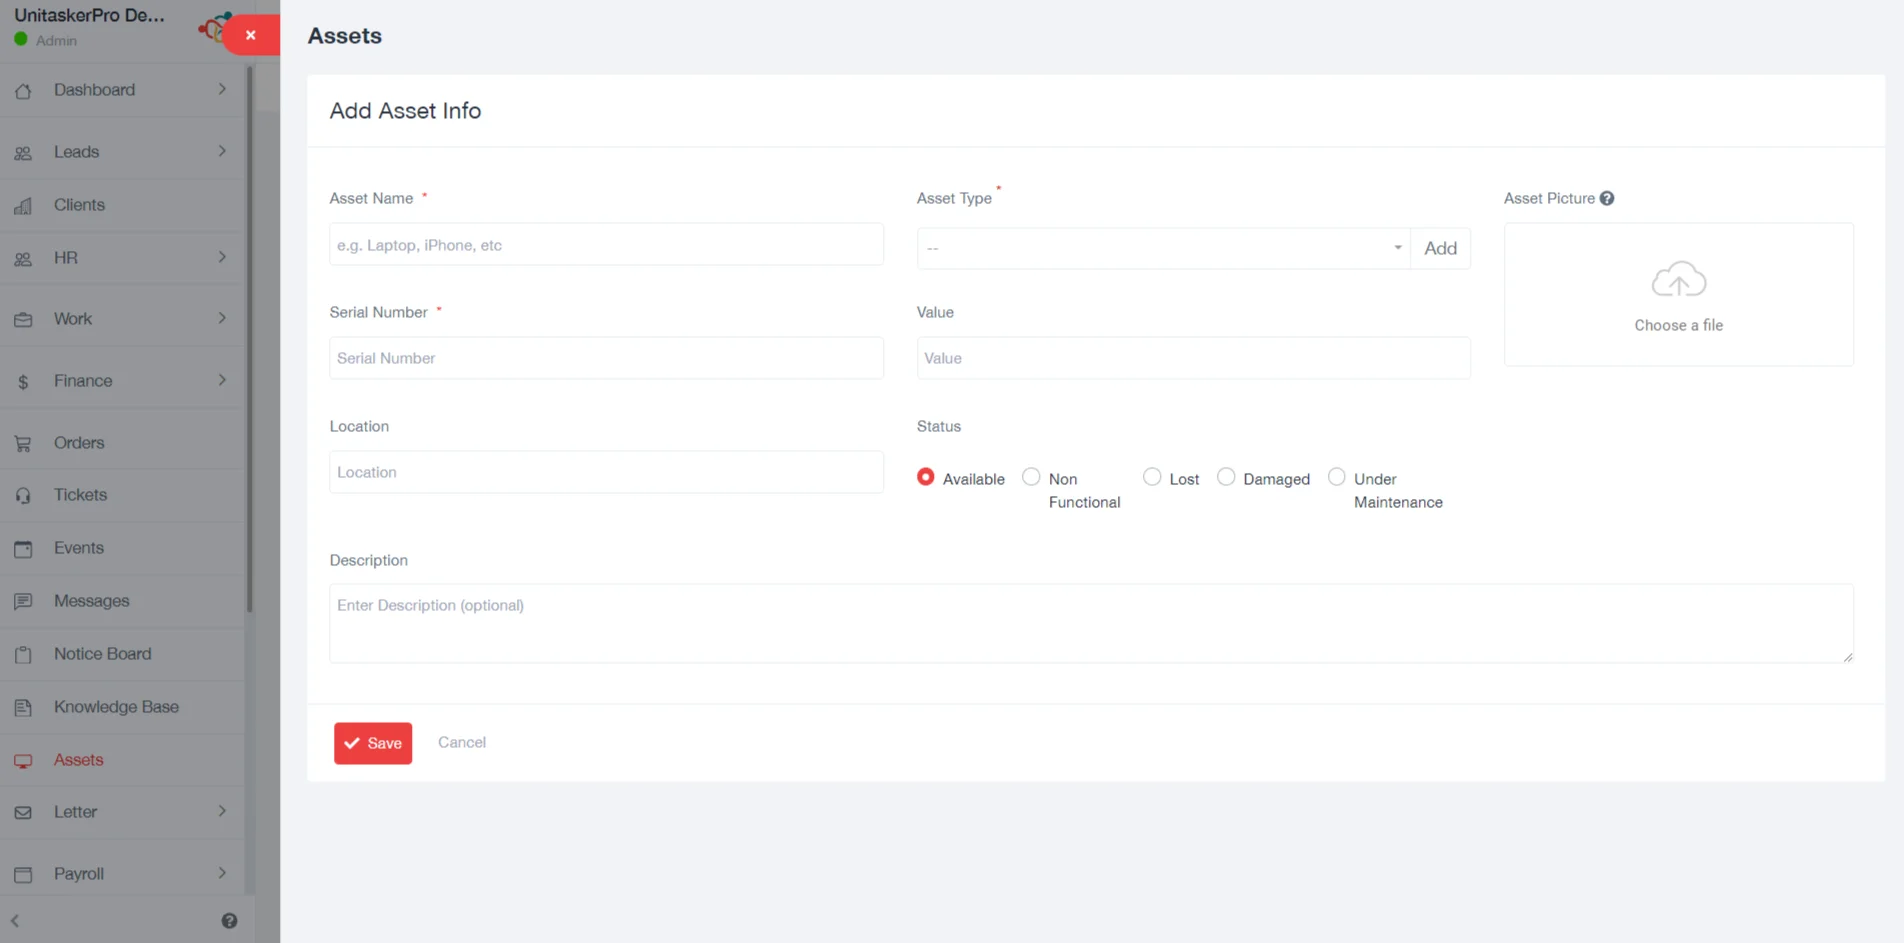
From the Asset Management page, find and click the ‘Add New Asset’ button. This opens a dedicated page for entering new asset details, ensuring that all relevant information about the asset is captured accurately.
Enter Asset Details
Fill in the following fields to add a new asset:
- Asset Name: Provide a unique name or identifier for the asset, helping users easily identify and refer to it in the system.
- Asset Type: Select the category or type that best describes the asset (e.g., electronics, furniture). This classification helps in organizing assets and performing specific asset management tasks.
- Asset Picture: Upload an image of the asset. A visual representation aids in quick identification and verification of the asset’s condition.
- Serial Number: Enter the manufacturer’s serial number or a unique identifier. This is crucial for tracking, maintenance, and warranty purposes.
- Value: Specify the asset’s monetary value or purchase price.
- Location: Indicate the physical location or department where the asset is stored or primarily used. Accurate location information is essential for asset retrieval and audits.
- Status: Choose the current condition or availability status from options such as Available, Non-Functional, Lost, Damaged, Under Maintenance. This status helps in managing the asset’s lifecycle and operational readiness.
- Description: Provide a brief description or any additional details about the asset. This can include specifications, usage guidelines, or any other relevant information.
Viewing and Managing Assets
After an asset is added, it appears in the Asset Management page list, displaying essential information. Each asset is associated with a multifunctional action button for further actions:
- View Asset Details: Access detailed information about the asset, including all the data entered during the addition process. This feature is useful for reviewing asset specifications or verifying asset information.
- Edit Asset: Modify asset details as needed. This functionality is crucial for keeping asset information up to date, reflecting changes in status, location, or other attributes.
- Lend Asset: Record instances when an asset is lent out, including the recipient and duration. This feature ensures accurate tracking of asset whereabouts and availability.
- Delete Asset: Remove an asset from the system. This action is used for assets that are disposed of, sold, or otherwise no longer part of the organization’s inventory.
Exporting Assets
The export function facilitates the download of asset information for external use, such as reporting or analysis:
- Click the ‘Export’ button on the Asset Management page.
- Follow the on-screen instructions to choose the export format and specify which asset details to include. This allows for customized reporting and data analysis outside of UniTaskerPro.
The Asset Management feature in UniTaskerPro simplifies the process of managing assets by providing a centralized platform for adding, viewing, and editing asset information. By following the steps outlined in this documentation, you can effectively manage your organization’s assets, ensuring accurate tracking and efficient utilization.


